Showing posts with label Keith Garvey. Show all posts

Monday, December 9, 2013

Happy New Year 14

Happy New Year '14
©Barbara Butler
December2013


I'm using Amy Marie's Happy New Years kit for this tag.  You may fine this kit at www.amymarieskits.com
Template-High Maintance by Vicky.  This template can be found at http://truetagginglove.blogspot.com.  I've had this template for awhile so if the link doesnt work I am sorry.  And if anyone knows where I can fine it please let me know so I can add the proper link.

Open up template and check to make sure it is at 72 DPI.  Duplicate the template and close the original.  Delete the copyright, word art and the dollar sign layers.

01.  Shape 1:  Select all, float, defloat.  Paste Pp6 as a new layer.  Invert the selection and hit the delete key.  Select none.  Delete or close the original layer.

02.  Layer 3:  Select all, float, defloat.  Paste Pp7 as a new layer.  Invert the selection and hit the delete key.  Select none.  Delete or close the original layer.

03.  Shape 3:  Select all, float, defloat.  Paste Pp8 into the selection.  Select none.

04.  Brush Layers:  Select alll, float, defloat.  Paste Pp2 as a new layer.  Invert the selection and hit the delete key.  Select none.  Delete or close the original layer.

05.  Shape 6 copy 2:  Select all, float, defloat.  Paste Pp5 as a new layer.  Invert the selection and hit the delete key.  Select none.  Delete or close the original layer.

06.  Shape 6 Copy:  Select all, float, defloat.  Paste Pp10 as a new layer.  Invert the selection and hit the delete key.  Select none.  Delete or close the original layer.

07.  Shape 6:  Select all, float, defloat.  Paste Pp15 as a new layer.  Invert the selection and hit the delete key.  Select none.  Delete or close the original layer.

08.  Gradient Fill1:  Select all, float, defloat.  Paste Pp17 into the selection.  Select none.

09.  Shape 2 Copy:  Select all, float, defloat.  Paste Pp22 as a new layer.  Invert the selection and hit the delete key.  Select none.  Delete or close the original layer.

10.  Delete the glitter fill layer.

11.  Twinkles:  Select all, float, defloat.  Paste Pp1 as a new layer.  Invert the selection and hit the delete key.  Select none.  Change the blend mode to dodge.

12.  Paste Element 3 on to the canvas.  Re size it by 55% once.  Place it on the bottom left.

13.  Paste Element 14 on to the canvas.  Place it on the bottom and behind Element 3.

14.  Paste Element 15 on to the canvas.  Re size it by 55% once.  Place it in the center of Element 14 and behind it.

15.  Paste Element 16 on to the canvas.  Re size it by 55% once.  Place it on top of the center rectangle.

16.  Paste Element 18 on to the canvas.  Re size it by 65% twice.  Place it behind the teddy bear.

17.  Paste Element 27 on to the canvas.  Re size it by 65% once.  Place it behind Element 14 and in front of the candles.

18. Paste Element 30 on to the canvas.  Re size it by 65% once.  Place it on the bottom right.

19.  Paste Element 35 on to the canvas.  Re size it by 50% once.  Place it on the left side.

20.  Paste element 87 on to the canvas.  Re size it by 50% once.  Place it behind the two elements on the left.

21.  Paste Element 90 on to the canvas.  Re size it by 65% once.  Place it in front of the 2014 element.

22.  Paste Tube(s) of choice on to the canvas.  Re size it as needed.  Place to your liking.  Add copyright.

23.  Add name and save as a pspimage.  Add any effects you would like.  Crop and re size the tag if needed.  Save as a png and you are done.


Thank you for taking a look at my tut.  Hope you have enjoyed it.

Wednesday, December 4, 2013

Christmas Bunny3

Christmas Bunny3
©Barbara Butler
December 2013


I'm using Amy Marie's Christmas Bunny 3 for this tut.  You can fine this kit at www.amymarieskits.com
Mask-WSL327

New Image 800X800 72DPI

01.  Paste Pp6 on to the canvas.  Apply the mask and merge the mask group.

02.  Paste Element 6 on to the canvas.  Re size it by 75% once.  Place it on the bottom.

03. Paste Element 4 on to the canvas.  Re size it by 75% once.  Place it on the bottom left.

04.  Paste Element 8 on to the canvas.  Re size it by 65% once.  Place it on the right side of Element 4.

05.  Paste Element 10 on to the canvas.  Re size it by 65% once.  Mirror it and place on the top left.

06.  Paste Element 13 on to the canvas.  Re size it by 65% once.  Place it on the top right.

07.  Paste Element 51 on to the canvas.  Re size it by 50% once.  Mirror it and place it on the bottom left and in front of the other elements.

08.  Paste Element 66 on to the canvas. Place it on top left and behind Element 10.

09.  Paste Element 69 on to the canvas.  Re size it by 50% once.  Mirror it and place it on the bottom right.

10.  Paste Element 79 on to the canvas.  Re size it by 65% once.  Mirror it and place it on the right behind Element 69.

11.  Paste Tube(s) of choice on to the canvas.  Re size it if necessary and place it to your liking.

12.  Add name and save as a pspimage.  Add any effects you would like.  Crop and resize if needed.  Save as a png and you are done.

Thank you for taking a look at my tut.  Hope you have enjoyed it.

Monday, November 25, 2013

Cute Little Reindeer

Cute Little Reindeer
©Barbara Butler
November 2013


I'm using the adorabel Reindeer Cutie kit by Amy Marie for this tut.  You can fine this kit at www.amymarieskits.com

New Image 700X700 72 DPI

01.  Paste Element 71 on to the canvas.  Re size it by 75% once.  Rotate it 15 degrees to the left.

02.  Paste Element 67 on to the canvas.  Re size it by 75% once.  Rotate it 15 degrees to the left.  Place it behind Element 71.

03.  Paste Element 34 on to the canvas.  Re size it by 75% twice.  Place it front of the other elements on the left side.

04.  Paste Element 30 on to the canvas.  Re size it by 65% twice.  Place on the left of the post.

05.  Paste Element 26 on to the canvas.  Re size it by 65% once.  Place it on the bottom right.

06.  Paste Element 13 on to the canvas.  Re size it twice once by 50 then again by 75%.   Place it on the top.

07.  Paste Element 80 on to the canvas.  Place it behind all the elements.
Take magic wand and click on the in between the outlines, expand the selection by 2.  Add a new layer and paste Pp7 into the selection.  Select none.  Add an inner bevel of choice.
Back on the main frame layer click on the inside of the frame with the magic wand, expand by 4.  Add a new layer and paste Pp11 into the selection.  Select none.
Move both paper layers down below the frame.

08.  Paste Element 48 on to the canvas.  Re size it by 65% once.  Place it on top and to the left of Element 13.

09.  Paste Element 86 on to the canvas.  Re size it by 65% twice.  Mirror it and place it on the bottom left.

10.  Paste Element 66 on to the canvas.  Re size it by 65% twice.  Place it on the bottom and in front of the other elements.

11.  Paste Element 74 on to the canvas.  Place it behind the reindeer and snowman on the right side.

12.  Add Tube(s) of choice on to the canvas.  Re size if necessary and place to your liking.  Add copyright.

13.  Add name and save as a pspimage.  Add any effects you would like.  Crop and re size if necessary. Save as a png and you are done.

Thank you for taking a look at my tut.  Hope you enjoyed it.

Saturday, November 16, 2013

Gingerbread House

Gingerbread House
©Barbara Butler
November 2013


I'm using the delicious Gingie Christmas by Amy Marie for this kit.  You can fine this kit at www.amymarieskits.com
Mask:  WSL71

New Image 800X600 72DPI

01.  Paste Pp19 on to the canvas.  Apply the mask.  Merge mask group.  Duplicate it a few times and merge all the layers together.

02.  Paste Element 51 on to the canvas.  Re size it by 65% twice.  Place it on the bottom.

03.  Paste Element 50 on to the canvas.  Re size it by 65% twice.  Place on the right side of the house.

04.  Paste Element 21 on to the canvas.  Re size it by 65% once.  Place on the right side and behind the other elements.

05.  Paste Element 6 on to the canvas.  Re size it by 65% twice.  Place it on the left side and in front of the house.

06.  Paste Element 22 on to the canvas.  Re size it by 65% once.  Place behind the snowman.

07.  Paste Element 56 on to the canvas.  Re size it by 50% once.  Place it front of the other elements.

08.  Paste Tube(s) of choice on to the canvas.  Re size it if necessary.  Place to your liking.  I added a close up of the tube I used to the paper layer but you don't have to if you don't want to.  Add copyright.

09.  Add name and save as a pspimage.  Add any effects you would like.  Crop and re size it.  Save as a png and you are done.

Thank you for taking a look at my tut.

Sunday, November 3, 2013

My Gift

My Gift
©Barbara Butler
November 2013


Christmas Tut 10 using My Gift by Amy Marie.  This kit can be found at www.amymarieskits.com

New image 800X600 72DPI

01.  Paste  Window 1 on to the canvas.  Re size it by 75% once.  Take the magic wand and click on the inside of each square.  Expand it by 5.  Add a new layer and paste Pp013 into the selection add another new layer and paste Pp014 into the selection.  Change the blend mode of the second paper to Multiply.  Move the window above these two in the layer palette.

02.  Paste Snowman on to the canvas.  Re size by 75% twice.  Place on the bottom left.

03.  Paste Pup Cane on to the canvas.  Re size by 75% twice and place on the bottom right.

04.  Paste Mouse Cup on to the canvas.  Re size by 75% three times.  Place on the right side and mirror it.

05.  Paste Kitten In Box on to the canvas.  Re size by 75% three tmes.  Place on the right side of the snowman and move it below it.

06.  Paste Giftbox on to the canvas.  Re size by 75% twice.  Place below the other elements.

07.  Paste Christmas Balls on to the canvas.  Re size by 75% twice.  Place on the top right.

08.  Paste Candycane 2 on to the canvas.  Re size by 75% three times.  Mirror it and place on the top left.

09.  Paste Candle 1 on to the canvas.  Re size by 75% twice.  Place on the bottom rigth.

10.  Paste Bunny on to the canvas.  Re size by 75% twice.  Place on the bottom left.

11.  Paste Element 5 on to the canvas.  Place on the left side and below the other elements.

12.  Paste The Word Art on to the canvas.  Select all, float, defloat.  Modify, Borders, Outside width 1, Paste Pp010 as a new layer, invert the selection and hit the delete key.  Move the paper layer down below the word art layer.  Merge the two together.  Re size it by 75% twice and place towards the top of the canvas.  You might want to sharpen it a little bit.  Add a drop shadow of choice.

13.  Paste Tube of choice on to the canvas.  Re size it as needed.  Add copyright.

14.  Add name and save as a pspimage.  Add any effects you would like.  Crop and re size as needed.  Save as a png and you are done.

Thank you for taking a look at my tut.

Friday, October 4, 2013

♥Little Wish♥

Little Wish
©Barbara Butler
October 2013


Materials:
Scrap Kit-
Little Wish by Amy Marie.  This kit can be found at www.amymarieskits.com

New image 900x700

Element 74-
Paste on to canvas.  Take the magic wand and click on the inside.  Expand selection by 7.  Add a new layer and paste Pp16 into selection.  Select none.  Move the paper layer below the frame.

Element 4-
Paste on to canvas.  Resize by 75% once.  Move to the bottom of the frame.

Element 6-
Paste on to canvas.  Place on the left side below Element 4.  On the paper layer select all, float, defloat back on the flowers hit delete.

Element 1-
Paste on to canvas.  Rsize by 75% twice.  Rotate 15 degrees to the right.  Place on the top right.

Element 21-
Paste on to canvas.  Resize by 75% once.  Move to bottom right.

Element 53-
Paste on to canvas. Move it to the top left.

Element 57-
Paste on to canvas.  Resize by 75% twice.  Move to the bottom of the frame and in the layer palette place it above the paper layer.

Element 62-
Paste on to canvas.  Resize by 75% twice and place behind the fox.

Element 96-
Paste on to canvas.  Resize by 75% once and place in front of the fox.

Element 103-
Paste on to canvas.  Resize by 75% twice mirror it and place it behind and to the left of the birds.

Element 115-
Paste on to canvas.  Mirror it and place on the bottom left.

Element 112-
Paste on to canvas.  Resize by 75% three times.  Place on the right side and behind the road.

Element 111-
Paste on to canvas.  Place behind the top butterfly.

Element 99-
Paste on to canvas. Place on the left and below the paper layer.

Tube-
Paste tube of choice on to canvas.  Resize as needed and place where you would like.  Add copyright.

Add name and save as a pspimage.  Add any effects you would like.  Crop and resize as needed.  Save as a png and you are done.

Thank  you for taking a look at my tut.

Friday, September 13, 2013

§Birthday Diva§

Birthday Diva
©Barbara Butler
September 2013


Materials:
Scrap Kit:  Amy By Amy Marie.  Can be found exclusively Here
Template:  AM-Birthday Template1 This template is apart of this kit.

Step1:  Template
Open up the template.  Duplicate it CTRL+D.  Close the original.   Make sure the template is at 72DPI to stay within TOU of many tube artists.

Step2:  Papers
Layer1:
Select all>float>defloat.  Paste PP19 into selection.  Select none.
Layers 2&3:
Select all>float>defloat.  Paste PP23 as a new layer.  Invert selection and hit delete.  Select none.
Layer 4:
Select all>float>defloat.  Paste PP26 as a new layer.  Invert selection and hit delete.  Select none.
Layer 5:
Select all>float>defloat.  Paste PP7 into selection.  Select none.
Layer 6:
Select all>float>defloat.  Paste PP30 into selection.  Select none.
Layer 7:
Select all>float>defloat.  Paste PP25 as a new layer.  Invert selection and hit delete.  Select none.
Layer 8:
Select all>float>defloat.  Paste PP32 into selection.  Select none.
Layer 10:
Select all>float>defloat.  Paste PP28 into selection.  Select none.
Layer 9:
Select all>float>defloat.  Paste PP5 as a new layer.  Invert selection and hit delete.  Select none.

Step3:  Elements
Paste Element 210 on to canvas.  Resize by 75%.  Place on the bottom right.
Paste Element 207 on to canvas.  Resize by 75%.  Place behind Element 210.
Paste Element 208 on to canvas.  Place on the left side beside the wordart.  Duplicate and flip horizontal. Place this one over to the right of the wordart.  And move down behind the Elements 210 and 207.
Paste Element 191 on to canvas.  Flip horizontal and place it on the bottom left.
Paste Element 193 on to canvas.  And move to the top of the tag.  In the layer palette send it to the bottom.
Paste Element 178 on to canvas.  Place on the top right and send to the bottom.
Paste Element 179 on to canvas.  Bring to the top and place in front of Element 208.
Paste Element 164 on to canvas.  Place to the top of the heart balloon on the right.
Paste Element 154 on to canvas.  Resize by 75% and place in front of Elements 210 and 207.
Paste Element 153 on to canvas.  Move to the left and place behind Element 193.
Paste Elements 151 and 152 on to canvas.  Resize them by 75%.  Place one to the right of the birthday cake and one to the left.
Paste Element 122 on to canvas.  Place to the right of the elements on the right.

Step 4:  Tube
Paste tube of choice on to canvas.  Resize as needed.  Add copyright.

Step 5:  Finishing Touches
Add name and save as a pspimage.  Add any effects gradient glow, drop shadow (if you want).  Crop and resize as needed.  Save as a png and you are done.

Thank you for taking a look at my tut.

Monday, September 9, 2013

Something Wicked Comes This Way

Something Wicked Comes This Way
©Barbara Butler
September 2013


Materials
Scrap Kit:  Happy Witch by Amy Marie.  This kit can be found Here
Mask:  WSL307

Instructions:  All elements are resized by 75% unless other wised stated.   Some wont be resized.

New Image:
800x600 72DPI

Step1:  Elements
Paste Element 51 on to canvas.
Paste Element 62 on to canvas.  Place in front of element 50 make sure element 51 shows over it a little bit.  Merge down with the other element.  
Paste Element 54 on to canvas.  Place on the left side of  element 51.
Paste Element 48 on to canvas.  Move to the bottom of the tree.  Duplicate it and move the duplicate to the right a little bit.
Paste Element 40 on to canvas.  Place in front of the other elements except the tree.
Paste Element 38 on to canvas.  Resize twice.  Place on the left side of the tree.
Paste Element 15 on to canvas.  Place behind element38.
Paste Element 3 on to canvas.  Resize once and place behind elements 38 and 15.
Paste Element 2 on to canvas.  Resize once and place on the right side behind the skulls in the grass (element 40).

Step2:  Papers
On the bottom layer Select all and paste PP11 into selection.  Select none.  
Hide the paper layer and go to one of the element layers and merge visible.
Back on the paper layer apply the mask.  Merge mask group.

Step3:  Tube
Add tube of choice.  I'm using two tubes by Keith Garvey.  I put one in front of the mask layer and changed the blend mode to Luminance (L).  And I placed the other in front of the merged group.  Please do not use these without buying them and having the proper license to use them.  Add copyright.

Step4:  Finishing Touches
Add name and save as a pspimage.  Add any effects you want like gradient glow, drop shadow, etc.  Crop and resize as needed and save as a png.  And you are done.

Thank you for taking a look at my tut.

Sunday, September 8, 2013

Blue

Blue
©Barbara Butler
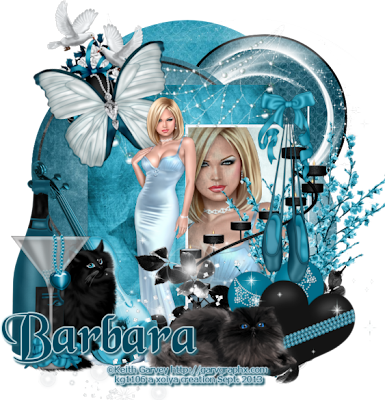
September 2013


Materials:
Scrap Kit:  Nicole by Amy Marie can be found Here
Template:  TonyaDebCollab1 can be found at creativebynature1.blogspot or tonyastempations.blogspot.com

Instructions:

Template:  Duplicate the template CTRL+D.  Close the original.  Make sure the template is at 72DPI or lower to stay within license companies guidelines.  Delete the copyright layer and the wordart.

Paper Instructions:
There are some layers that get the same paper as another layer and they'll be posted together but you'll want to the step twice once for each layer.

Circles 1&2:
Select all>float>defloat.  Paste PP1 into selection.  Select none.

Rectangle 1:
Select all>float>defloat.  Paste PP16 into selection.  Select none.

Shape 1 and Half Shape 1:
Select all>float>defloat.  Paste PP19 as a new layer, invert and hit delete.  Select none.

Shape 2 and Half Shape 2:
Select all>float>defloat.  Paste PP18 as a new layer, invert and hit delete.  Select none.

Rectangle:
Select all>float>defloat.  Paste PP4 into selection.  Select none.

Circle Frame:
Select all>float>defloat.  Paste PP7 as a new layer, invert and hit delete.  Select none.

Rectangle Frame and Rectangle 2 Background:
Select all>float>defloat.  Paste PP8 as a new layer, invert and hit delete.  Select none.

Element Instructions:
All elements will be resized by 75% unless other wised stated.  See my tag for placement.

Element1:
Paste on to canvas.  Resize and place on the right side.

Element2:
Paste on to canvas.  Resize and place on the left.

Element13:
Paste on to canvas.  Resize twice.  Rotate 15 degrees to the left.  Place on the top left.

Element24:
Paste on to canvas.  Resize twice.  Place behind element13.

Elements20&21:
Paste 20 on to canvas.  Resize it once and rotate 15 degrees to the left.  Now paste 21 on to canvas.  Resize once and rotate 15 degrees to the right.  Merge 21 down with 20.  Resize two more times and place on the bottom right.

Element 25:
Paste on to canvas.  Place behind element2.

Element44:
Paste on to canvas.  Flip vertically and place behind the hearts.

Element52:
Paste on to canvas.  Mirror and place behind the wine.

Element82:
Paste on to canvas.  Resize once.  And place in beside the wine.

Element 88:
Paste on to canvas.  Resize once.  Place in front of the hearts just to where the black overlaps the blue one.

Element110:
Paste on to canvas.  Place behind the other elements and in front of the rectangle layer.

Element111:
Paste on to canvas.  Place behind teh candle stand.

Element 73:
Paste on to canvas.  Place in front of Raster 4.

Element 76:
Paste on to canvas.  Resize and place to your liking.

Elements 71&73:
Paste on to canvas and place where you would like.

Tube:
Paste tube of choice on to canvas.  Resize as needed.  Place to your liking.  Add copyright.

Finishing Touches:
Add name to the tag and save as a pspimage.  Crop and resize the tag as needed.  Save as a png and you are done.

Thank you for taking a look at my tut.  Any comments are greatly appreciated.

Sunday, April 14, 2013

§What a Girl Wants§

 What A Girl Wants
©Barbara Butler
April 13, 2013


This tutorial was written from my own imagination.  And any resememblence to any other is purely coincidental.  The tag was made in PSPX5 but any version will do.  And any painting program will work just fine.

Materials Needed:
Scrap Kit:  What A Girl Wants By Hania's Design you can fine the kit at Mystical Scraps Here
Eye Candy 4000 Gradient Glow

Font of choice I used Sick City Capital you can fine it at Dafont.com

Settings:
Drop Shadow:
For CU Tube: 4, 6, 100, 0, color of choice I used #6f0342.

Supplies:
Papers:
Papers 03

Elements:
04, 06, 09, 19, 24, 27, 49, 64, 75, 77

Lets Begin

New Canvas 800X600

Elements:
All elements are resized by 75% unless otherwised stated.  See my tag for placement.

01.  Paste Element 77 on to the canvas.  Resize.  With magic wand click on the inside of the frame and paste Paper 03 on to the canvas invert and hit delete on your keyboard.

02.  Paste Element 75 and resize twice.  Free rotate 30 degrees to the left.  Duplicate mirror the copy and move to the left.

03.  Paste Element 27 and resize.  Duplicate and mirror.  Duplicate the original one more time resize and free rotate 30 degrees to the left.  And now on the first copy layer duplicate and resize and free rotate 30 degrees to the right.

04.  Paste Element 24.  Move to the bottom of the frame.  And place in front of the bigger flowers.

05.  Paste Element 06 and re size four times.  Bring to the top (unless you're already there) and place in front of the smaller flowers.

06.  Paste Element 04 and re size three times.  And place to the left of Element 24.

07.  Paste Element 09 re size twice.  And place to the right of Element 24.

08.  Paste Element 49 and re size three times.  Place to the right and behind the flower in the layer palette.

09.  Paste Element 64 re size twice.  Place on top of the frame left side.

Tube:

Tube of choice.  I'm using the amazing artwork of Keith Garvey.  This is his LE for April 2013.  Any tube will do.  Please do not use with out a proper license.

01.  On the paper layer select all, float, de float, and a new raster layer and paste CU of tube (if yours comes with one), into selection.  Deselect.  Add a gradient glow of choice.  My settings for this are glow width of 3 (the rest on the basic tab remains the same).  For the color I just picked a color out of the tube.  You can move the arrows to where ever you would like.  Add a drop shadow of choice or use my settings.

02.  Paste your main tube resize to desire size.  And place just in front of Element 24.  You might need to move Element 04 behind the tube but that will all depend on the size of your tube.


Finishing Touches:

Add your copyright and name (do not convert the name to a raster yet).  Save as a psp.  Now convert to raster.  With crop tool crop the canvas down to size.  Now if its still to big (most forums dont like having tags bigger then 600) you might want to re size your tag).  Save as a png and you are done.  You can add any embellishments to the name that you want.  I like adding eye candy, inner bevel, and drop shadow to mine.

Thank you for taking a look at my tut.

Friday, February 15, 2013

Girls Night Out

Girls Night Out
©Barbara Butler


Supplies Needed:
Scrap Kit:  Girls Night Out By Freaks Creations Found Here
Template05_2013 By Me Found Here
WSLMask84  Link to her website is on the side.
Photo editing program of choice.  I use PSP X4 but any program should work just fine.
A few tubes of choice.  I used the artwork of Verymany in one example.  And the artwork of Keith Garvey in another. Please don't use either of these without buying them and having a license to use them.  Verymany can be found at PFD and Keith Garvey has his own store.  All links are on the side.

This tut was written by me and any similarities to any other tutorial is purely coincidental.  It was written for those with working knowledge of psp.

Remember to save often

Let's Begin

Open template, duplicate and close the original.  Delete the copyright layer.

Paper Instructions:

On the very bottom layer select all and paste P1 into selection.  Unselect.  Apply the mask and merge the mask group.

On raster 3 select all, float, defloat, paste P7 onto canvas invert and hit delete.  Unselect.

On raster 7 select all, float, defloat, past P5 onto canvas ivert and hit delete.  Unselect.

On the middle rectangle select all, float, defloat and paste P12 into selection.  Unselect.

On the other two layers select all, float, defloat and paste P9 into selection.  Unselect.

On Raster 4 select all, float, defloat, paste P10 onto canvas invert and hit delete.  Unselect.  Repeat for Copy of Raster 4.

Element Instructions:*
*All elements are resized by 75% unless stated other wise stated.

Paste E11 onto canvas just behind the bottom rectangle.  No resizing is necessary for this.  Just move it down a little so you can see the three rectangles behind it.  See mine for proper placement.

Paste E2 onto canvas bring to the top in the layer palette.  Resize three times and place to the left.  

Paste E3 onto canvas.  Resize by 75% once and then by 85% and move down in front of the piano keys.

Paste E16 onto canvas put behind E11 and the wordart.  No resizing necessary.  See my tag for proper placement.

Paste E20 onto canvas move to the right.  No resizing necessary.  See my tag for proper placement.

Paste E23 onto canvas.  Resize three times, and move to left the left of the left rectangle.

Paste E22 onto canvas.  Mirror and resize four times and move to the bottom left of E23.

Paste E27 onto canvas.  Resize once.  Mirror and move to the right.  In the layer palette move it just above the mask layer.

Paste E5 onto canvas.  Resize twice.  Free rotate 15 degrees to the right.  Move to the right just below the piano keys and the banner.

Paste E7 onto canvas.  Resize once, move to the right and below the rectangle layers.  Make sure none of the top part is showing.  Duplicate, mirror and move to the left.

Paste E4 onto canvas.  Resize three times.  Move behind the fan.  Duplicate two times (So it is not transparent) and merge these three layers.

Paste Your tubes onto the canvas.  Resize as necessary.  And place to your liking. 

Add copyright and save as a psp. 

Add name and any effects you want to the name.  I like using a gradient glow, resize as needed and save as png.

Thank you for taking a look at my tut.

Here is the one with Keith Garvey tubes.