Monday, September 30, 2013

Save The Tatas

Save The Tatas
©Barbara Butler
September 2013


Materials:
Scrap Kit-
October Girls by Amy Marie.  Can be found at www.amymarieskits.com.


Lets Begin. 

New Image-800x600

01.  Paste Element 72 on to canvas.  Resize by 85%.  With magic wand click on the inside.  Expand the selection by 5.  Paste Pp5 as a new layer.  Invert the selection and hit delete.  Select none.

02.  Paste Element 9 on to canvas.  Resize by 65% twice.  Place on the bottom right.

03.  Paste Element 71 on to canvas.  Resize by 75% once.  Place on the left side.  Add a drop shadow so you can see the element.

04.  Paste Element 79 on to canvas.  Resize by 75% twice.  Rotate 15 degrees to the right.  Place on the top right.

05.  Paste Element 87 on to canvas.  Resize by 75% three times.  Rotate 15 degrees to the left.  Place on the bottom left.

06. Paste Element 95 on to canvas.  Send to the bottom and move it over to the right so some of the butterflies are showing on the right.

07.  Paste Element 135 on to canvas.  Bring it to the top.  Resize by 75% three times.  Place on the bottom left and behind the music note.

08.  Paste tube of choice on to canvas.  Resize as needed and place to your liking.  Add copyright.

09.  Add name and save as a pspimage.  Add any effects you would like.  Crop and resize as needed.  Save as a png and you are done.

Thank you for taking a look at my tut.

Sunday, September 29, 2013

October Girl

October Girl
©Barbara Butler
September 2013


Materials: 
Scrap Kit-Mega October Girls by Amy Marie.  This kit can be found at www.amymarieskits.com.
Template-MPMOctoberGirls03 by Millie.  This template can be found in the kit.

Step 1-Template
Open up the template and make sure it is at 72dpi.  Duplicate it and close the original.  Delete the copyright layer.  To be able to fit the elements on later you will want to resize the canvas a little.

Step 2-Papers.  I'm writing the layers as I see them in the layer palette.
1-Select all>float>defloat.  Paste Pp10 into selection.  Select none.
2-Select all>float>defloat.  Paste Pp15 into selection.  Select none.
3-Select all>float>defloat.  Paste Pp16 into selection.  Select none.
4-Select all>float>defloat.  Paste Pp16 into selection.  Select none.
5-Select all>float>defloat.  Paste Pp19 as a new layer.  Invert the selection and hit delete.  Select none.  Delete or close the original layer. 
6-Select all>float>defloat. Paste Pp19 as a new layer.  Invert the selection and hit delete.  Select none.  Delete or close the original layer.
7-Select all>float>defloat.  Paste Pp27 as a new layer.  Invert the selection and hit delete.  Select none.  Delete or close the original layer.
8-Select all>float>defloat.  Paste Pp27 as a new layer.  Invert the selection and hit delete.  Select none.  Delete or close the original layer.

Step 3-Elements. 
Paste Element 2 on to canvas.  Resize by 75% twice.  Place in front of the top circle.
Paste Element 5 on to canvas.  Resize by 75% three times.  Place on the bottom.  Flip horizontal
Paste Element 10 on to canvas. Resize by 75% twice.  Place behind and to the left of Element 5.  Flip horizontal.
Paste Element 11 on to canvas.  Resize by 65% three times.  Rotate 15 degrees to the right.  Place in the top right corner.  And move behind the rectangle.
Paste Element 18 on to canvas.  Resize by 65%.  Place on the bottom right (make sure its the top layer).
Paste Element 28 on to canvas.  Resize by 65% and rotate 15 degrees to the right.  Place to the right and behind Element 18.
Paste Element 38 on to canvas.  Resize by 65% twice.  Place to the right and in front of Element 18.
Paste Element 40 on to canvas.  Resize by 65% twice.  Place in front of Elements 5 and 10.
Paste Element 46 on to canvas.  Resize by 65% once.  Place behind and to the left of Element 18.
Paste Element 47 on to canvas.  Place behind the elements on the right. 
Paste Element 50 on to canvas.  Resize by 65% once.  Place beside Element 28.
Paste Element 183 on to canvas.  Resize by 65% once.  Mirror it and place behind the elements on the left and just to the left of the shoe.
Paste Element 128 on to canvas.  Resize by 65% once.  Place on the right side of the fan.
Paste Element 139 on to canvas twice.  Place one on the left side and mirror the other and put that one on the right side.  Place them behind the other elements on both sides.
Paste Elements 164 and 165 on to canvas.  Resize them by 65% twice.  Place both on top of Element 139 (the one the right) flip one and move to the right and below the other one.
Paste Element 125 on to canvas.  Place in front of the of the green rectangle layer in the layer palette.

Step 4-Tube
Paste tube of choice on to canvas.  Resize as needed.  Place to your liking.  Add copyright.

Step 5-Finishing Touches
Add name and save as a pspimage.  Add any effects you would like.  Crop and resize as needed.  Save as a png and you are done.

Thank you for taking a look at my tut.

Saturday, September 28, 2013

♥Fight Like A Girl♥

Fight Like A Girl
©Barbara Butler
September 2013


Materials:
Scrap Kit-Mega October Girls by Amy Marie.  Can be found at www.amymarieskits.com
Template-MPMOctoberGirls by Millie.  Can be found in the kit.
Wordart-Fight Like a Girl by Sarah.  Can be found in the kit as well.

Step 1:   Template
Open up the template.  Make sure it is at 72dpi and duplicate it.  Close the original.  Delete the copyright layer.  You'll want to resize the canvas so you can fit the elements on it right.

Step 2:  Papers-I'm only putting down the number of the layers as they appear in the layer palette.
1-Select all>float>defloat.  Paste PP5 into selection.
2-Select all>float>defloat.  Paste PP5 into selection.
3-Select all>float>defloat.  Paste PP7 as a new layer.  Invert the selection and hit delete.  Select none.  Delete or close the original layer.
4-Select all>float>defloat.  Paste PP6 as a new layer.  Invert the selection and hit delete.  Select none.  Delete or close the original layer.
5-Select all>float>defloat.  Paste PP3 as a new layer.  Invert the selection and hit delete.  Select none.  Delete or close the original layer.  Add HSB Noise with the following settings:  from top to bottom-31, 30, 40, 0, 10.08, 10.08, smooth lumps, seamless tile checked, random seed 1.
6-Select all>float>defloat.  Paste PP18 as a new layer.  Invert the selection and hit delete.  Select none.  Delete or close the original layer.
7-Select all>float>defloat.  Paste PP18 as a new layer.  Invert the selection and hit delete.  Select none.  Delete or close the original layer.
8-Select all>float>defloat.  Paste PP17 as a new layer.  Invert the selection and hit delete.  Select none.  Delete or close the original layer.
9-Select all>float>defloat.  Paste PP17 as a new layer.  Invert the selection and hit delete.  Select none.  Delete or close the original layer.
10-Select all>float>defloat.  Paste PP25 into selection.  Select none.
11-Select all>float>defloat.  Paste PP25 into selection.  Select none.

Step 3- Elements
Paste the word art on to canvas.  Place on the top.
Paste Element 3 on to canvas.  Resize by 75% twice.  Place on the left side on top of the left circle.
Paste Element 13 on to canvas.  Resize by 75% three times.  Rotate 15 degrees to the right and place on the bottom right.
Paste Element 66 on to canvas.  Place on the left side behind Element 3.
Paste Element 71 on to canvas.  Place on the left side and behind Element 66.
Paste Element 91 on to canvas.  Resize by 75% once.  Place behind the gloves on the right.
Paste Element 95 on to canvas.  Place behind the circles on the right.
Paste Element 178 on to canvas.  Resize 75% twice.  Bring it to the top in the layer palette.  Place on the bottom left.
Paste Element 180 on to canvas.  Place in front of the dog.
Paste Element 179 on to canvas.  Resize by 75% once.  Place behind the elements on the right.  Move it over so you can see the word love.

Step 4-Tube
Paste tube of choice on to canvas. Resize as needed and place to your liking. 
Go to layer 10 and select all>float>defloat.  Paste your tube as a new layer, invert the selection and hit delete.  Select none.  You might need to mirror the tube before you copy and paste over on to the canvas.  Repeat this for layer 11.  If you want you can change the blend mode on these two layers to what ever looks best with your tube.

Step 5- Finishing Touches
Add name and save as a pspimage.  Crop and resize as needed.  Save as a png and you are done.

Thank you for taking a look at my tut.

♥Pink Power♥

Pink Power
©Barbara Butler
September 2013


Materials:
Scrap Kit-
Mega October Girls by Amy Marie.  Kit can be found at www.amymarieskits.com
Template-
MPMOctoberGirls01 by Millie it comes in the kit. 

Step 1-Template
Open up the template.  Check to make sure it is at 72dpi.  Duplicate the template and delete the original.  Delete the copyright layer.

Step 2-Papers I'm going to only put the number of the layers as they appear in the layer palette.
1-Select all>float>defloat.  Paste PP5 into selection.  Select none.
2-Select all>float>defloat.  Paste PP24 into selection.  Select none.
3-Select all>float>defloat.  Paste PP24 into selection.  Select none.
4-Select all>float>defloat.  Paste PP18 into selection.  Select none.
5-Seleect all>float>defloat.  Paste PP15 as a new layer.  Invert the selection and hit delete.  Select none.  Delete or close the original layer.
6-Select all>float>defloat.  Paste PP27 into selection.  Select none.
7-Select all>float>defloat.  Paste PP13 into selection.  Select none.
8-Select all>float>defloat.  Paste PP16 into selection.  Select none.
9-Select all>float>defloat.  Paste PP13 into selection.  Select none.

Step 3-Elements
Paste Element 174 on to canvas.  Resize by 65% once.  Place on the left side.
Paste Element 173 on to canvas.  Resize by 75% once.  Place on the right side.
Paste Element 170 on to canvas.  Resize by 75% twice.  Place in front of 173.
Paste Element 167 on to canvas.  Resize by 75% three times.  Rotate 15 degrees to the left.   Place behind the candle stick.  Duplicate it and flip the duplicate horizontally and place beside the original.
Paste Element 166 on to canvas. Resize by 75% three times.  Place in front of the other two pillows.  Resize the candle one more time by 75% and place on the right side of the green pillow.
Paste Element 169 on to canvas.  Resize by 65% three times.  Fip Horizontal, and place on the left side of the green pillow.
Paste Element 177 on to canvas.  Resize by 65% once then by 75% once.  Place in front of the green pillow.  Flip horizontal.
Go back to paper layer 4.  Select all>float>defloat.  Add a new layer and paste Element 176 into selection.  Select none.  Change the blend mode to dodge.
Paste Element 165 on to canvas.  Flip horizontal and resize by 65% three times.  Place in the top left corner of the green square on the left.
Paste Element 45 on to canvas.  Resize by 65% once.  Place on the bottom of canvas and behind the other elements.
Paste Element 33 on to canvas.  Resize by 65% once.  Place on the top left and just on top of paper layer 4.
Paste Element 12 on to canvas.  Resize by 65% twice.  Place on the top right.
Paste Element 4 on to canvas.  Resize by 65% three times.  Place on the top right and behind Element 12.

Step 4-Tube
Paste tube of choice on to canvas.  Resize as needed.  Place to your liking.  Add copyright.

Step 5-Finishing Touches
Add name and save as a pspimage.  Add any effects you would like.  Crop and resize as needed.  Save as a png and you are done.

Thank you for taking a look at my tut.

Thursday, September 26, 2013

♥Witchy Woman♥

Witchy Woman
©Barbara Butler
September 2013


Materials
Scrap Kit-
Witch & Friends by Amy Marie.  Kit can be found at www.amymarieskits.com.
Template-
Witchy Woman by Leah of Gimptastic Tuts.  Can be found at www.amyleahsgimptastictuts.blogspot.com.

Step 1-Template
Open up template.  Make sure its at 72 dpi.  Duplicate it and close the original.  Delete the copyright layer.  You will need to resize the canvas a little.  Increase it to your liking.

Step 2-Papers
Circle 2-Select all>float>defloat.  Paste PP10 into selection.  Select none.
Square 3-Select all>float>defloat.  Paste  PP11 as a new selection.  Invert the selection and hit delete.  Select none.  Delete or close the original layer.
Circle 1-Select all>float>defloat.  Paste PP13 as a new layer.  Invert the selection and hit delete.  Select none.  Delete or close the original layer.
Square 1-Select all>float>defloat.  Paste PP9 as a new layer.  Invert the selection and hit delete.  Select none.  Delete or close the original layer.
Square 2-Select all>float>defloat.  Paste PP8 as a new layer.  Invert the selection and hit delete.  Select none.  Delete or close the original layer.
Rect 2-Select all>float>defloat.  Paste PP7 as a new layer.  Invert the selection and hit delete.  Select none.  Delete or close the original layer.
Rect 1-Select all>float>defloat.  Paste PP6 as a new layer.  Invert the selection and hit delete.  Select none.  Delete or close the original layer.
Words 1-Select all>float>defloat.  Paste PP3 into selection.  Select none.  Repeat for Words 2.  Add a dark gradient glow to the bottom wordart layer.  Add a drop shadow of choice on the same layer.

Step 3-Elements
Paste Element 38 on to canvas.  Resize by 65% once.  Place on the left side.
Paste Element 40 on to canvas.  Resize by 65% twice.  Flip horizontal and place on the right side.
Paste Element 41 on to canvas.  Resize by 65% once.  Place behind the shoes.
Paste Element 28 on to canvas.  Resize by 65% then by 75%.  Place in front of the pumpkin.
Paste Element 3 on to canvas.  Place behind the elements on the right.
Paste Elements 12-15 on to canvas one at a time.  Resize each by 75% and rotate two 15 degrees to the right and the other two to the left.  Place end to end and merge the four together.  Resize 75% two more times.  Place on the bottom and behind the word art.
Paste Element 8 on to canvas.  Resize by 75% twice.  Flip horizontal.  Place behind the elements on the left.
Paste Element 30 on to canvas.  Resize by 65% twice.  Place above the word art.
Paste Element 33 on to canvas.  Resize by 65% twice.  Place to the left of Element 30.  Duplicate it.  Flip the duplicate horizontally and place to the right.
Paste Element 64 on to canvas.  Place behind the elements in the middle.
Paste Element 63 on to canvas.  Place behind Element 64.
Paste Element 65 on to canvas.  Move it up just a little bit.

Step 4-Tube
Paste tube of choice on to canvas.  Resize as needed and place where you would like.  Add copyright.

Step 5-Finishing Touches
Add name and save as a pspimage.  Add any effects you would like.  Crop and resize as needed.  Save as a png and you are done. 

Thank you for taking a look at my tut.

Goth Fairyland

Goth Fairyland
©Barbara Butler
September 2013


Materials
Scrap Kit-
Goth in Fairyland by Amy Marie.  Can be found at www.amymarieskits.com
Step 1- Beginning
New image 900x700 72dpi

Step 2-Elements
Paste Element 34 on to canvas.  Move down.
Paste Element 30 on to canvas.  Resize by 75% once.  Place behind Element 34.
Paste Element 35 on to canvas.  Bring to the top and place in front of Element 34.
Paste Element 56 on to canvas.  Resize by 75% once and flip horizontal and place behind and to the left of Element 30.
Paste Element 62 on to canvas.  Resize by 75% twice.  Rotate 15 degrees to the right. 
Paste Element 61 on to canvas.  Resize by 75% twice.  Rotate 15 degrees to the left.  Merge with Element 62 and place on the bottom right.
Paste Element 71 on to canvas.  Resize by 75% once.  Place behind Element 35.
Paste Element 116 on to canvas.  Flip horizontal.  Place behind the wheel.
Paste Element 4 on to canvas.  Resize by 75% flip horizontal, and place in front and to the right of the wheel.

Step 3-Tube
Paste tube of choice on to canvas.  Resize if needed.  Place to your liking.  Add copyright.

Step 4-Finishing Touches
Add name and save as a pspimage.  Add any effects.  Crop and resize as needed.  Save as a png and you are done.

Thank you for taking a look at my tut.

Wednesday, September 25, 2013

§Poor Little Rich Girl§

Poor Little Rich Girl
©Barbara Butler
September 2013


Materials:
Scrap Kit-
Vanity2 by Amy Marie.  Can be found at www.amymarieskits.com.
Temp-
AlishaDebTemp 4 can be found at creative misfits blog.

Step 1- Template
Open up template.  Make sure it is at 72dpi.  Duplicate it and close the original.  Delete the copyright layer.

Step 2- Papers
Raster 2-Select all>float>defloat.  Paste PP2 into selection.  Select none.
Raster 9-Select all>float>defloat.  Paste PP3 as a new layer.  Invert the selection and hit delete.  Select none.  Delete or close the original raster.
Copy of Raster 9-Select all>float>defloat.  Paste PP6 as a new layer.  Invert the selection and hit delete.  Select none.  Delete or close the original raster.
Raster 5 and all the copies of the Raster-Select all>float>defloat.  Paste PP7 as a new layer.  Invert the selection and hit delete.  Select none.  Delete or close the original rasters.
Raster 3-Select all>float>defloat.  Paste PP5 as a new layer.  Invert the selection and hit delete.   Select none.  Delete or close the original. 
Raster 1-Select all>float>defloat.  Paste PP9 as a new layer.  Invert the selection and hit delete.  Select none.  Delete or close the original.
Raster 8-Select all>float>defloat.  Paste PP1 as a new layer.  Invert the selection and hit delete.  Select none.  Delete or close the original.
Raster 6-Select all>float>defloat.  Paste PP3 as a new layer.  Invert the selection and hit delete.  Select none.  Delete or close the original.
Raster 7-Select all>float>defloat.  Paste PP6 as a new layer.  Invert the selection and hit delete.  Select none.  Delete or close the original.
Raster 4-Select all>float>defloat.  Paste PP5 as a new layer.  Invert the selection and hit delete.  Select none.  Delete or close the original.
Copy of Vector1-Select all>float>defloat.  Paste PP2 into selection.  Select none.

Step 3-Elements
Paste Element 1 on to canvas.  Resize by 75% once.  Place on the bottom left.
Paste Element 5 on to canvas.  Resize by 75% three times.  Rotate 15 degrees to the left and place over the frame.
Paste Element 6 on to canvas.  Resize by 75% three times.  Rotate 15 degree to the right.  Place below and to the right of the frame.
Paste Element 9 on to canvas.  Resize by 75% once.  Place on the right side of the frame.
Paste Element 84 on to canvas.  Place on the left and behind Element 1.
Paste Element 86 on to canvas.  Place on the top.
Paste Elements 102-104 on to canvas.  Merge the three together.  Resize by 75% three times and place just above Element 1.
Element 23 on to canvas.  Resize by 75% once.  Place behind Element 1.
Paste Element 16 on to canvas.  Resize by 75% once.  Place in front of Element 23.
Paste Element 15 on to canvas.  Resize by 75% twice.  And place behind Element 6.
Paste Element 14 on to canvas.  Resize by 75% twice.  Rotate 15 degrees to the right.  Place behind Elements 15 and 6.
Paste Element 11 on to canvas.  Place above the circle raster.
Paste Element 22 on canvas.  Keeping it in the middle of the canvas place above the elements on the left in the layer palette.  Make sure the elements on the right are below it in the layer palette. 

Step 4- Tube
Raster 16-Select all>float>defloat.  Paste tube of choice as a new layer resize it as needed place into the selection.  Invert the selection and hit delete.  Select none.  Change the blend mode to Luminance (L).  Add a drop shadow of choice.
Paste tube of choice on to canvas again.  Resize as needed.  Place to your liking.
Add copyright.

Step 5- Finishing Touches
Add name and save as a pspimage.  Add any effects you would like.  Crop and resize as needed.  Save as a png and you are done.

Thank you for taking a look at my tut.

Monday, September 23, 2013

♥Vanity♥

Vanity
©Barbara Butler
September 2013


Materials:

Scrap Kit-
Vanity By Amy Marie.  Kit can be found at www.amymarieskits.com.


-Instructions-
New image 900x700 72dpi.

Step 1- Element
Paste Element 18 on to canvas.  Place on the right side.  Flip horizontal.
Paste Element 19 on to canvas.  Resize by 75% twice.  Flip horizontal and place beside the teapot.
Paste Element 21 on to canvas.  Place behind the other two.
Paste Element 22 on to canvas.  Place in front of Element 21.
Paste Element 30 on to canvas.  Place behind the others.
Merge all these elements together and resize them by 75%.
Paste Element 40 on to canvas.  Send to the bottom in the layer palette.
Paste Element 36 on to canvas.  Resize by 75% once.  Place behind the elements on the left.
Paste Element 37 on to canvas.  Place on the right side.
Paste Element 42 on to canvas.  Resize by 75% once.  Place behind Element 37.  Rotate 15 degrees to the left.
Paste Element 43 on to canvas.  Place on the left side.
Paste Element 46 on to canvas.  Resize by 75% twice.  Place behind the wings.
Paste Element 63 on to canvas.  Flip horizontal and place just above the frame.
Paste Element 68 on to canvas.  Resize by 75% three times and place on the top right side.
On the frame area take the magic wand and click on the inside.  Expand by 5 add a new layer and paste PP3 into selection.

Step 2-Tube
Paste tube of choice on to canvas.  Resize as needed.  Place to your liking.  Add copyright.

Step 3-Finishing Touches
Add name and save as a pspimage.  Crop and resize as needed.  Save as a png and you are done.

Thank you for taking a look at my tut.

§Princess and the Dragon§

Princess and the Dragon
©Barbara Butler
September 2013


Materials:
Scrap Kit-
Samaelia by Amy Marie.  Can be found at www.amymarieskits.com
Tempate-
Template 53 by Rissas Designs

Tube-
Princess and the Dragon by ZlataM can be found at picsfordesign.

Step 1-Template: 
Make sure the template is at 72dpi.  Duplicate it and close the original.  Delete the copyright and the wordart.  You might need to resize the canvas so you can place the elements.
From bottom layer to the top.  I'm only writing the down the number for each layer as they appear in the layer palette.

Step 2-Papers
1-Select all>float>defloat.  Paste PP14 as a new layer.  Invert the selection and hit delete.  Select none.
2-Select all>float>defloat.  Paste PP3 as a new layer.  Invert the selection and hit delete.  Select none.  Repeat this for 5.
6-Select all>float>defloat.  Paste PP6 as a new layer.  Invert the selection and hit delete.  Select none.
3-Select all>float>defloat. Paste PP3 as a new layer.  Invert the selection and hit delete.  Select none.
8-Select all>float>defloat.  Paste PP16 into selection.  Select none.
7-Select all>float>defloat.  Paste PP17 into selection.  Select none.  Repeat for 4.

Step 3-Elements
Paste Element 7 on to canvas.  Resize by 75% three times. Place on the left.
Paste Element 3 on to canvas.  Resize by 75% once.  Place behind and to the left of Element 7.
Paste Element 8 on to canvas.  Reisze by 75% once.  Place in front of Element 7.
Paste Element 29 on to canvas.  Resize by 75% once.  Place on the top right.  Send it to the bottom in the layer palette.
Paste Element 33 on to canvas.  Resize by 75% once.  Place it on the bottom and behind the rats.
Paste Element 60 on to canvas.  Resize by 75% once.  Place behind Element 33.
Paste Element 70 on to canvas.  Resize by 75% once.  Flip horizontal and place behind Element 33 on the right side.
Paste Element 79 on to canvas.  Duplicate the layer 3 times and merge the three together.
Paste Element 78 on to canvas.  Place on the top right.
Paste Element 80 on to canvas.  Place on the bottom left and behind the other left.
Paste Element 81 on to canvas.  Place on the bottom and behind Element 33.

Step 4-Tube
Paste tube of choice on to canvas.  Resize as needed.  And place to your liking.  Add copyright.

Step 5-Finishing Touches
Add name and save as a pspimage.  Add any effects.  Crop and resize as needed.  Save as a png and you are done.

Thank you for taking a look at my tut.

Sunday, September 22, 2013

§Bree§

Bree
©Barbara Butler
September 2013


Materials

Scrap Kit-
Bree by Amy Marie.  Can be found at www.amymarieskits.com

Template-
Template by Missy of Creative Misfits.  This one was a part of her challenge finish this tag.  You might be able to fine it over on her blog www.divineintentionz.blogspot.com.

Step 1- Template
Open up template.  Make sure it is set at 72 dpi.  Duplicate it and close the original.  Erase any copyright.  Resize to 866x601.

Step 2- Papers
Raster 4-Select all>float>defloat.  Paste PP18 selection.  Select none.
Raster 5-Select all>float>defloat.  Paste PP10 as a new layer.  Invert the selection and hit delete.  Select none.
Raster 7-Select all>float>defloat.  Paste PP19 into selection.  Select none.
Raster 17-Select all>float>defloat.  Paste PP5 into selection.  Select none.
Raste 12-Select all>float>defloat.  Paste PP23 as a new layer.  Invert the selection and hit delete.  Select none.  Repeat for Copy of Raster 12.
Raster 6-Select all>float>defloat.  Paste PP6 as a new layer.  Invert the selection and hit delete.  Select none.  Repeat for Copy of Raster 6.
Raster 9-Select all>float>defloat.  Paste PP15 as a new layer.  Invert the selection and hit delete.  Select none.  Repeat for Copy of Raster 9.
Raster 8-Select all>float>defloat.  Paste PP13 as a new layer.  Invert the selection and hit delete.  Select none.  Repeat for Copy of Raster 8.
Raster 18-Select all>float>defloat.  Paste PP17 as a new layer.  Invert the selection and hit delete.  Select none.  Repeat for Copy of Raster 18.
Raster 11-Select all>float>defloat.  Paste PP3 as a new layer.  Invert the selection and hit delete.  Select none.  Repeat for Copy of Raster 11.
Raster 2-Select all>float>defloat.  Paste PP7 as a new layer.  Invert the selection and hit delete.  Select none.
Raster 20-Select all>float>defloat.  Paste PP1 into selection.  Select none.  Repeat for Copy of Raster 20.
Rasters 13&19-Select all>float>defloat.  Paste PP14 as a new layer.  Invert the selection and hit delete.  Select none.  Repeat for the Copy of Rasters 13&19.
Raster 10-Select all>float>defloat.   Paste PP16 as a new layer.  Invert the selection and hit delete.  Select none.  Repeat for Copy of Raster 10.
Raster 15-Select all>float>defloat.  Paste PP15 as a new layer.  Invert the selection and hit delete.  Select none.  Repeat for Copy of Raster 15.
Raster 16-Select all>float>defloat.  Paste PP5 as a new layer.  Invert the selection and hit delete.  Select none.  Repeat for Copy of Raster 10.

Step 3- Elements
Paste Element 2 on to canvas.  Resize by 75% once and flip horizontal.  Place on the left.
Paste Element 7 on to canvas.  Resize by 75% three times.  Place on the right.
Paste Element 5 on to canvas.  Resize by 75% twice and place behind Element 2.
Paste Element 16 on to canvas.  Resize by 75% once.  And place behind Element 7.
Paste Element 17 on to canvas.  Resize by 75% twice.  Place on the bottom and behind all the other elements.
Paste Element 36 on to canvas.  Resize by 75% three times.  Flip horizontal and bring to the top.
Paste Element 32 on to canvas.  Resize by 75% once.  Place behind Elements 7&16.
Paste Element 78 on to canvas.  Resize by 75% three times.  And place behind and to the left of Element 2.
Paste Element 75 on to canvas.  Rotate 30 degrees to the left.  Place behind the squirrel.
Paste Element 37 on to canvas.  Resize by 75% once.  Flip horizontal and place behind the other elements on the right.

Step 4- Tube
Paste tube of choice on to canvas.  Resize as needed.  And place where you would like.  Add copyright.

Step 5-  Finishing Touches
Add name and save as a pspimage.  Add any effects you would like.  Crop and resize as needed.  Save as a png and you are done.

Thank you for taking a look at my tut.

Friday, September 20, 2013

§Black Magic Woman§

Black Magic Woman
©Barbara Butler
September 2013


Materials:
Scrap Kit-
Sexy Witch by Amy Marie can be found at www.amymarieskits.com/store
Template-
PBS-Template162 by Punky Butts

Template-
Open up the template.  Make sure it is at 72dpi.  Duplicate it and close the original.  Delete the copyright layer.

Step 1-Papers
Square Black Right and Square Black Left-
Merge together.  Select all>float>defloat.  Paste PP3 into selection.
Large Circle-
Select all>float>defloat.  Paste PP5 into selection.
Left and Right Circles-
Select all>float>defloat.  Paste PP4 as a new layer.  Invert the selection and hit delete.  Select none.
Left and Right Top Black Rectangles-
Select all>float>defloat.  Paste PP2 as a new layer.  Invert the selection and hit delete.  Select none.
Left and Right Dark Grey Square-
Select all>float>defloat.  Paste PP7 as a new layer.  Invert the selection and hit delete.  Select none.  Repeat this for the bottom Dark Grey Squares.
Light grey squares (Top and bottom)-
Select all>float>defloat.  Paste PP13 as a new layer.  Invert the selection and hit delete.  Select none.
Large and Small Red Rectangles-
Select all>float>defloat.  Paste PP11 as a new layer.  Invert the selection and hit delete.  Select none.
Vamp Wordart-
Select all>float>defloat.  Paste PP8 as a new layer.  Invert the selection and hit delete.  Select none.  Repeat this step for The Lady wordart layer.
IS A Wordart-
Select all>float>defloat.  Paste PP10 as a new layer.  Invert the selection and hit delete.  Select none.
Merge the Vamp wordart down to the glow layer and rotate 90 degrees to the left.  Merge all the wordart layers together and resize by 75%.  Place on the bottom in the middle of the elements.

Step 2:  Elements-
Paste Element 1 on to canvas.  Resize by 75% twice then by 85% once, and place on the bottom left.
Paste Element 4 on to canvas.  Resize by 85% once, and place behind Element 1.
Paste Element 9 on to canvas.  Resize by 75% twice.  Flip horizontal and place to the right of Element 1.
Paste Element 27 on to canvas.  Resize by 75% twice and place on the bottom right.
Paste Element 33 on to canvas. Resize 75%.  Flip horizontal and place in front of Element 27.
Paste Element 39 on to canvas.  Resize 75% and place behind Element 27.
Paste Element 48 on to canvas.  Resize by 75%.  Place on the top left.  Rotate 15 degrees to the right.
Paste Element 64 on to canvas.  Resize by 75% twice.  Rotate 15 degrees to the right.  Place on the top right.
Paste Element 70 on to canvas.  Move to bottom and behind the elements on the right.
Paste Element 72 on to canvas.  Resize by 75% twice and place in front of Element 70.

Step 3:  Tube-
Paste tube of choice on to canvas.  Resize as needed.  And place to your liking.  Add copyright.

Step 4:  Finishing Touches
Add name and save as a pspimage.  Add any effects you would like.  Crop and resize as needed.  Save as a png and you are done.

Thank you for taking a look at my tut.

Wednesday, September 18, 2013

The Great Pumpkin

The Great Pumpkin
©Barbara Butler
September 2013

Materials:

Scrap Kit: 
Pumpkin by Amy Marie and can be found at amymarieskits.com/store

Template:
Template163 by Punky Butts

Step 1:  Template
Make sure temp is at 72DPI. 
Open up template hit CTRL+D to duplicate it.  Close the original. 
Delete copyright layer.

Step 2:  Papers
Black Circle
Select all>float>defloat.  Paste PP16 into selection.  Select none.
Right and Left Squares
Select all>float>defloat.  Paste --15 into selection.  Select none.
Right Square and Left Top Square
Select all>float>defloat.  Paste PP4 as a new layer, invert selection and hit delete.  Select none.
Large Square
Select all>float>defloat.  Paste PP14 into selection.
Left Square and Right Bottom Square

Step 3:  Elements-all elements will be resized by at least 75% unless it says other wised.  Somewon't be resized at all.
Paste Element 6 on to canvas.  Bring it to the top (if you're not there already).  Place on top of the circle.
Paste Element 1 on to canvas.  Resize once.  Place on the bottom left.
Paste Element 36 on to canvas.  Resize once.  Place on the bottom right.
Paste Element 72 on to canvas.  Place behind the bat and pumpkin on the left and make sure it is behind the wordart on top.
Paste Element 78 on to canvas.  Resize once.  Duplicate it and mirror the duplicate.  Move it over just a little bit so it looks like double lamp post.  Merge the two together.
Paste Element 95 on to canvas.  Place on the bottom of the canvas behind the other elements.
Paste Element 80 on to canvas.  Place on top of Element 95.
Paste Element 71 on to canvas.  Resize twice.  Place behind the bat and pumpkin.
Paste Element 24 on to canvas.  Resize once.  Place behind the crow.

Step 4:  Tube
Paste tube of choice on to canvas.  Resize as needed.  And place to your liking.

Step 5:  Finishing touches
Put name on tag.  Save as a pspimage.  Add any effects you would like.  Crop and resize as needed.  Save as a png and you are done.  

Thank you for taking a look at my tut.

Monday, September 16, 2013

§As Time Goes By§

As Time Goes By
©Barbara Butler
September 2013


Materials:
Scrap Kit:  Cynthia by Amy Marie can be found at www.amymarieskits.com/store
Mask:  WSL 84

Open up new image 1000x750 72DPI.

Step 1:  Elements-All elements will be resized by 75% unless other wised stated.  Some wont be resized at all.
Paste Element 5 on to canvas.  Leave right where it is.
Paste Element 31 on to canvas.  Place behind the clock and move down just a little bit so the clock is in the center of it.
Paste Element 27 on to canvas.  Resize once.  Place on the left side of the clock.  Make sure its on top.
Paste Element 34 on to canvas.  Resize twice.  Place on the bottom right of the clock.  Rotate 15 degrees to the right.
Paste Element 37 on to canvas.  Leave where it is at and send it to the bottom.
Paste Element 38 on to canvas.  Resize twice.  Place behind the hour glass.
Paste Element 39 on to canvas.  Resize twice.  Place behind the other flower.
Paste Element 45 on to canvas.  Resize once.  Flip horizontal and place on the left side, behind the heart layer.
Paste Element 51 on to canvas.  Place on the bottom.  In the layer palette move it behind the clock.
Paste Element 83 on to canvas.  Place on the bottom and in the layer palette place in front of the clock.
Paste Element 79 on to canvas.  Resize three times.  Rotate 15 degrees to the right.  And place on the top right of the clock.
Go to the bottom layer in the layer palette.  Select all and paste PP6 into selection.  Select none.  Apply mask.  Merge mask group.

Step 2:  Tube
Paste tube of choice on to canvas.  Resize as needed.  Place in front of the clock but make sure the hearts and butterfly layers are underneath the tube in the layer palette.

Step 3:  Finishing Touches
Add name and save as a pspimage.  Add any effects that you want like gradient glow, drop shadow etc. 
Crop and resize as needed.  Save as a png and you are done.

Thank you for taking a look at my tut.

Friday, September 13, 2013

Its My Party

Its My Party
©Barbara Butler
September 2013


Materials:
Scrap Kit:  Amy by Amy Marie Kits can be found @ amymarieskits.com/store.
Template:  Can be found in the kit.  It is the third one.

Step 1:  Template
Open up the template.  Hit CTRL+D to duplicate it.  Close the original.  Make sure the temp is at 72DPI.

Step 2:  Papers
Raster1:
Select all>float>defloat.  Paste PP32 into selection.  Select none.
Raster2:
Select all>float>defloat.  Paste PP30 into selection.  Select all>float>defloat.  Add a new layer and paste Element 4 into selection, move down just a little bit so it sits at the bottom.
Raster 7 and Copy of Raster 7:
Select all>float>defloat.  Delete the inside and paste PP23 into selection.
Raster 3:
Select all>float>defloat.  Delete the inside and paste PP16 into selection.
Raster8:
Select all>float>defloat.  Paste PP25 as a new layer, invert the selection and hit delete.  Select none.
Raster 4:
Select all>float>defloat.  Delete the inside and paste PP24 into selection.
Rasters 5&6:
Select all>float>defloat. Delete the inside and paste PP26 into selection.  Add an inner bevel and a drop shadow of choice.

Step 3:  Elements-See my tag for placement.
Paste Element 16 on to canvas.  Place in the middle of Raster 9.
Select all>add a new layer and paste Element 4 into selection.  Place in front of Element 16 but place all the way on the bottom.
Paste Element 184 on to canvas two times.  Leave one right where it appears, and place the other one over on to raster 2 for the avatar.
Paste Element 196 on to canvas.  Resize by 75% three times and place in the right corner of the avatar square.
To add a border.  Select all: Selections>modify>borders:  both sides, width5, anti alias checked.  Add a new layer and paste a paper of choice into selection.


Step 4:  Tube
On Raster 2 Select all>float>defloat.  Paste tube of choice and resize as needed invert the selection and hit delete. 
Now this is a timeline size template so if you use it for a timeline on facebook do not add the url but do add everything else.

Step 5:  Finishing touches
Add name, save as a pspimage.  Add any effects to the name.  Resize if you want.  Save as a png.  And you are done.

Thank you for taking a look at my tut.

Celebrate Good Times

Celebrate Good Times
©Barbara Butler
September 2013


Materials:
Scrap Kit:  Amy by Amy Marie can be found exclusively at her store Here
Template:  Can be found in the Kit.

Step 1:  Template
Open up the template. Hit CTRL+D to duplicate it and close the original.  Make sure it is at 72DPI.   Resize canvas to 900x900.  This will give you more room for your elements later on.

Step 2:  Papers
Layers 1&2:
Select all>float>defloat.  Paste PP19 as a new layer.  Invert the selection and hit delete.  Select none.
Layer 4:
Select all>float>defloat.  Paste PP20 into selection.  Select none.
Layer 3:
Select all>float>defloat.  Paste PP24 as a new layer.  Invert selection and hit delete.  Select none.
Layers 5&6:
Select all>float>defloat.  Paste PP27 as a new layer.  Invert selection and hit delete.  Select none.
Layer 10:
Select all>float>defloat.  Paste PP29 into selection.  Select none.
Layer 7:
Select all>float>defloat.  Paste PP16 as a new layer.  Invert selection and hit delete.  Select none.
Layer 8:
Select all>float>defloat.  Paste PP14 as a new layer.  Invert selection and hit delete.  Select none.
Layer 9:
Select all>float>defloat.  Paste PP8 as a new layer.  Invert selection and hit delete.  Select none.
Layers 11-14:
Merge these four layers together.  Select all>float>defloat.  Paste PP12 as a new layer.  Invert selection and hit delete.  Select none.  Add a drop shadow of choice.

Step 3:  Elements.  All elements will be resized by 75% unless other wised stated.  And some won't resized at all.   See my tag for proper placement.  Or you can put the elements where you would like.
Paste Element 211.  Move to the top left and send to the bottom in the layer palette.
Paste Element 206 on to canvas.  Move behind all the circle layers.  Add a drop shadow of choice.
Paste Element 202 on to canvas.  Resize twice.  Flip horizontal.  Place in the bottom left corner of the tag.
Paste Element 200 on to canvas.  Place behind Element 202.
Paste Element 199 on to canvas.  Resize twice.  Place on the bottom right.
Paste Element 185 on to canvas.  Move down just a little bit below the word art.  Add a gradient glow of choice.
Paste Element 176 on to canvas.  Resize once.  Move to the bottom of the tag and behind the elements.
Paste Element 71 on to canvas.  Resize once.  Flip horizontal and place behind the elements on the left.

Step 4:  Tube
Paste tube of choice on to canvas.  Resize as needed.  And place where you would like. 
Back on the half circle layer select all>float>defloat and paste tube as a new layer.  Resize it as needed.  Invert selection and hit delete.  Select none.  Change blend mode to overlay.

Step 5:  Finishing Touches:
Add name and save as a pspimage.  Add any effects you would like.
Crop and resize as needed.  Save as a png and you are done.

Thank you for taking a look at my tut.

§Birthday Diva§

Birthday Diva
©Barbara Butler
September 2013


Materials:
Scrap Kit:  Amy By Amy Marie.  Can be found exclusively Here
Template:  AM-Birthday Template1 This template is apart of this kit.

Step1:  Template
Open up the template.  Duplicate it CTRL+D.  Close the original.   Make sure the template is at 72DPI to stay within TOU of many tube artists.

Step2:  Papers
Layer1:
Select all>float>defloat.  Paste PP19 into selection.  Select none.
Layers 2&3:
Select all>float>defloat.  Paste PP23 as a new layer.  Invert selection and hit delete.  Select none.
Layer 4:
Select all>float>defloat.  Paste PP26 as a new layer.  Invert selection and hit delete.  Select none.
Layer 5:
Select all>float>defloat.  Paste PP7 into selection.  Select none.
Layer 6:
Select all>float>defloat.  Paste PP30 into selection.  Select none.
Layer 7:
Select all>float>defloat.  Paste PP25 as a new layer.  Invert selection and hit delete.  Select none.
Layer 8:
Select all>float>defloat.  Paste PP32 into selection.  Select none.
Layer 10:
Select all>float>defloat.  Paste PP28 into selection.  Select none.
Layer 9:
Select all>float>defloat.  Paste PP5 as a new layer.  Invert selection and hit delete.  Select none.

Step3:  Elements
Paste Element 210 on to canvas.  Resize by 75%.  Place on the bottom right.
Paste Element 207 on to canvas.  Resize by 75%.  Place behind Element 210.
Paste Element 208 on to canvas.  Place on the left side beside the wordart.  Duplicate and flip horizontal. Place this one over to the right of the wordart.  And move down behind the Elements 210 and 207.
Paste Element 191 on to canvas.  Flip horizontal and place it on the bottom left.
Paste Element 193 on to canvas.  And move to the top of the tag.  In the layer palette send it to the bottom.
Paste Element 178 on to canvas.  Place on the top right and send to the bottom.
Paste Element 179 on to canvas.  Bring to the top and place in front of Element 208.
Paste Element 164 on to canvas.  Place to the top of the heart balloon on the right.
Paste Element 154 on to canvas.  Resize by 75% and place in front of Elements 210 and 207.
Paste Element 153 on to canvas.  Move to the left and place behind Element 193.
Paste Elements 151 and 152 on to canvas.  Resize them by 75%.  Place one to the right of the birthday cake and one to the left.
Paste Element 122 on to canvas.  Place to the right of the elements on the right.

Step 4:  Tube
Paste tube of choice on to canvas.  Resize as needed.  Add copyright.

Step 5:  Finishing Touches
Add name and save as a pspimage.  Add any effects gradient glow, drop shadow (if you want).  Crop and resize as needed.  Save as a png and you are done.

Thank you for taking a look at my tut.

Tuesday, September 10, 2013

§Whispers Of Autumn§

Whispers Of Autumn
©Barbara Butler
September 2013


Materials:

Scrap Kit:
Autumn Whisper By Amy Marie.  This kit can be found Here
Template: 
Bracket Template By Abstract Creations.  You can fine this template at www.abstractcreations.org

Instructions:
Make sure template is at 72DPI to stay within license companies terms of use.

Step 1:  Template
Open up template.  Duplicate it and close the original.  Delete the copyright layer.

Step 2:  Papers
Shape 5: 
Select all>float>defloat.  Paste PP7 into selection.  Add an inner bevel with the following setting:  Bevel2, 25, 4, 1, 6, 9, 315, 50, 30 color white.
Shape 3: 
Select all>float>defloat.  Paste PP15 as a new layer.  Invert and hit delete.  Invert again then go to layer 1 and hit delete to get rid of the inside of it.  Move layer 1 up above PP15. 
Layer1: 
Stay on this layer.  Select all>float>defloat.  Paste PP11 into selection.  Add the same inner bevel as before.
Shape 6 and Shape 6 Copy:
Select all>float>defloat.  Paste PP9 into selection.
Shape2:
Select all>float>defloat.  Paste PP1 into selection.
Shape4:
Select all>float>defloat.  Paste PP11 as a new layer, invert and hit delete.  Select none.  Add the same inner bevel as before.
Shape1: 
Select all>float>defloat.  Paste PP10 into selection.

Step 3:  Elements.  Make sure you are back on the top layer.
Paste Element 3 on to canvas.  Resize by 75%.  Place on the left side.
Paste Element 10 on to canvas.  Send to the bottom.
Paste Element 11 on to canvas.  Resize by 75%.  Mirror it and place it on the left side.  Rotate 15 degrees to the right.
Paste Element 12 on to canvas.  Resize by 75% twice.  Place in front of Element 11.
Paste Element 34 on to canvas.  Resize by 75%.  Place between Elements 10 & 3.
Paste Element 42 on to canvas.  Resize by 75% twice and place on the right side.  Repeat with Element 43. 
Paste Element 44 on to canvas.  Resize by 75% twice.  Place in front of the other two flowers.
Paste Element 86 on to canvas.  Resize by 75% twice.  Rotate 15 degrees to the right.  Place on the bottom behind the other elelments on the left.
Back on Raster 1 select all>float>defloat add a new layer and paste Element 85 into selection.
Merge the elements on the left side together and resize by 75% twice.  Do the same thing for the elements on the right.
Paste Element 91 on to canvas.  Resize by 75% twice.  Place on the top right.
Paste Element 95 on to canvas.  Resize by 75% twice.  Place on the top left.  Sharpen 3 times.
Paste Element 100 on to canvas.  Move below Raster 1 and place on the left.  Duplicate it and mirror.  Place the duplicate on the right side.
Paste Element 98 on to canvas.  Resize by 75% twice.  Rotate 15 degrees to the left.  Place behind Element 91.
Paste Element 107 on to canvas.  Resize by 75% twice.  And place behind the elements on the bottom left.

Step 4:  Tube
Paste tube of choice and resize as needed.  Place to your liking.  Add copyright.

Step 5:  Finishing Touches
Add name and save as a pspimage.  Crop and resize as needed.  Save as a png and you are done.

Thank you for taking a look at my tut.

Monday, September 9, 2013

Something Wicked Comes This Way

Something Wicked Comes This Way
©Barbara Butler
September 2013


Materials
Scrap Kit:  Happy Witch by Amy Marie.  This kit can be found Here
Mask:  WSL307

Instructions:  All elements are resized by 75% unless other wised stated.   Some wont be resized.

New Image:
800x600 72DPI

Step1:  Elements
Paste Element 51 on to canvas.
Paste Element 62 on to canvas.  Place in front of element 50 make sure element 51 shows over it a little bit.  Merge down with the other element.  
Paste Element 54 on to canvas.  Place on the left side of  element 51.
Paste Element 48 on to canvas.  Move to the bottom of the tree.  Duplicate it and move the duplicate to the right a little bit.
Paste Element 40 on to canvas.  Place in front of the other elements except the tree.
Paste Element 38 on to canvas.  Resize twice.  Place on the left side of the tree.
Paste Element 15 on to canvas.  Place behind element38.
Paste Element 3 on to canvas.  Resize once and place behind elements 38 and 15.
Paste Element 2 on to canvas.  Resize once and place on the right side behind the skulls in the grass (element 40).

Step2:  Papers
On the bottom layer Select all and paste PP11 into selection.  Select none.  
Hide the paper layer and go to one of the element layers and merge visible.
Back on the paper layer apply the mask.  Merge mask group.

Step3:  Tube
Add tube of choice.  I'm using two tubes by Keith Garvey.  I put one in front of the mask layer and changed the blend mode to Luminance (L).  And I placed the other in front of the merged group.  Please do not use these without buying them and having the proper license to use them.  Add copyright.

Step4:  Finishing Touches
Add name and save as a pspimage.  Add any effects you want like gradient glow, drop shadow, etc.  Crop and resize as needed and save as a png.  And you are done.

Thank you for taking a look at my tut.

Sunday, September 8, 2013

§Jewel§

Jewel
©Barbara Butler
September 2013


Material

Scrap Kit:  Jewel By Amy Marie.  This kit can be found Here

Mask:  WSL38 can be found at WeeScotsLass Creations


Instructions:

New Image:
800x600 72 DPI
All Elements will be resized by 75% unless other wise stated.

Step1:  Papers
Paste PP7 on to canvas.  Apply the mask and merge the mask group.  Select all, float, defloat, add a new layer paste PP9 into selection and select none.  Resize by 95%.

Step2:  Right Side
Paste Element 78 on to canvas and resize twice. 
Paste Element 80 resize twice, mirror and place on the right behind element 78, add a gradient glow and a drop shadow of choice.
Paste Element 81 on to canvas.  Resize twice and place on top of element 80. 
Paste Element 52 on to canvas.  Resize twice.
Paste Element 4 on to canvas.  Resize three times and place in front of element 52 just to the right of it.
Paste Element 1 on to canvas.  Resize once.  Place just above the mask layers.  And move down just a little bit.
With magic wand click on the inside of the frame.  Add a new layer and paste PP4 into selection.

Step3:  Left Side
Paste Element 75 on to canvas.  Resize twice.  Rotate 15 degrees to the left.
Paste Element 74 on to canvas.  Resize once and place behind element 75.
Paste Element 26 on to canvas.  Resize once and mirror it.  Place behind the other elements.

Step4:  Tube
Paste tube on to canvas.  Resize as needed.  And place where you would like.  Add copyright information

Step5:  Finishing Touches
Add name and save as a pspimage.  Add any effects you want to the name like a gradient glow, inner bevel, drop shadow etc.  Crop and resize if needed.  Save as a png and you are done.

Thank you for taking a look at my tut.

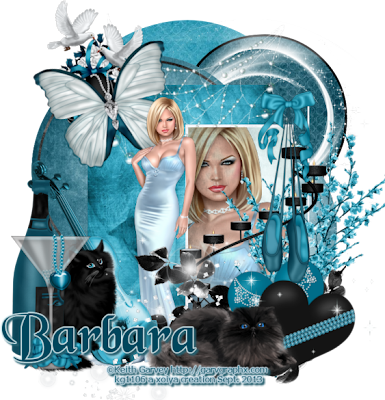
Blue

Blue
©Barbara Butler
September 2013


Materials:
Scrap Kit:  Nicole by Amy Marie can be found Here
Template:  TonyaDebCollab1 can be found at creativebynature1.blogspot or tonyastempations.blogspot.com

Instructions:

Template:  Duplicate the template CTRL+D.  Close the original.  Make sure the template is at 72DPI or lower to stay within license companies guidelines.  Delete the copyright layer and the wordart.

Paper Instructions:
There are some layers that get the same paper as another layer and they'll be posted together but you'll want to the step twice once for each layer.

Circles 1&2:
Select all>float>defloat.  Paste PP1 into selection.  Select none.

Rectangle 1:
Select all>float>defloat.  Paste PP16 into selection.  Select none.

Shape 1 and Half Shape 1:
Select all>float>defloat.  Paste PP19 as a new layer, invert and hit delete.  Select none.

Shape 2 and Half Shape 2:
Select all>float>defloat.  Paste PP18 as a new layer, invert and hit delete.  Select none.

Rectangle:
Select all>float>defloat.  Paste PP4 into selection.  Select none.

Circle Frame:
Select all>float>defloat.  Paste PP7 as a new layer, invert and hit delete.  Select none.

Rectangle Frame and Rectangle 2 Background:
Select all>float>defloat.  Paste PP8 as a new layer, invert and hit delete.  Select none.

Element Instructions:
All elements will be resized by 75% unless other wised stated.  See my tag for placement.

Element1:
Paste on to canvas.  Resize and place on the right side.

Element2:
Paste on to canvas.  Resize and place on the left.

Element13:
Paste on to canvas.  Resize twice.  Rotate 15 degrees to the left.  Place on the top left.

Element24:
Paste on to canvas.  Resize twice.  Place behind element13.

Elements20&21:
Paste 20 on to canvas.  Resize it once and rotate 15 degrees to the left.  Now paste 21 on to canvas.  Resize once and rotate 15 degrees to the right.  Merge 21 down with 20.  Resize two more times and place on the bottom right.

Element 25:
Paste on to canvas.  Place behind element2.

Element44:
Paste on to canvas.  Flip vertically and place behind the hearts.

Element52:
Paste on to canvas.  Mirror and place behind the wine.

Element82:
Paste on to canvas.  Resize once.  And place in beside the wine.

Element 88:
Paste on to canvas.  Resize once.  Place in front of the hearts just to where the black overlaps the blue one.

Element110:
Paste on to canvas.  Place behind the other elements and in front of the rectangle layer.

Element111:
Paste on to canvas.  Place behind teh candle stand.

Element 73:
Paste on to canvas.  Place in front of Raster 4.

Element 76:
Paste on to canvas.  Resize and place to your liking.

Elements 71&73:
Paste on to canvas and place where you would like.

Tube:
Paste tube of choice on to canvas.  Resize as needed.  Place to your liking.  Add copyright.

Finishing Touches:
Add name to the tag and save as a pspimage.  Crop and resize the tag as needed.  Save as a png and you are done.

Thank you for taking a look at my tut.  Any comments are greatly appreciated.

Saturday, September 7, 2013

♥With Love♥

With Love
©Barbara Butler
September 2013


Materials:
Scrap Kit: 
With Love by Amy Marie.  This kit is part of a collab you can fine this kit and the rest of the collab Here.

Template:
Template34 by Rissas Designs

Instructions:

Template:
Make sure the template is at 72DPI to stay within license company guidelines.  Now duplicate the template and close the original.  Delete the copyright layer.

Layer7:
Select all>float>defloat.  Paste PP2 into selection and select none.

Layer6:
Select all>float>defloat.  Paste PP3 into selection and select none.

Layer5:
Select all>float>defloat.  Paste PP7 into selection and select none.

Layer4:
Select all>float>defloat.  Paste PP8 as a new layer invert and hit delete.  Select none.

Layer3:
Select all>float>defloat.  Paste PP1 into selection and select none.

Layer2:
Select all>float>defloat.  Paste PP9 as a new layer, invert, and hit delete.  Select none.

Layer1:
Select all>float>defloat.  Paste PP5 as a new layer, invert and hit delete.  Select none.

Element 44:
Paste on to canvas.  Place in the top left corner of layer7.

Element 10:
Paste on to canvas.  Resize by 75% twice.  And place on the bottom right.

Element 15:
Paste on to canvas.  Resize by 75% twice and place behind element 10.

Element 14:
Paste on to canvas.  Resize by 75%.  Rotate 15 degrees to the left and place behind element 10.

Element 17:
Paste on to canvas.  Resize by 75% twice.  Place on the bottom left.

Element 16:
Paste on to canvas.  Resize by 75% twice.  Place in front of element 17.

Element 24:
Paste on to canvas.  Resize 75%.  Mirror and flip it.  Place it behind the other two on the left.

Element 23:
Paste on to canvas.  Resize by 75% twice.  Rotate 15 degrees to the left.  Place in front of element 14.

Element 27:
Paste on to canvas.  Resize by 75%.  Move behind the othe elements on the right.

Element 35:
Paste on to canvas.  Resize by 75%.  Place behind the other elements on the left.

Element 47:
Paste on to canvas.  Place to your liking.


Tube:
Paste on to canvas.  Resize as needed.  Place to your liking.  Add copyright.

Finishing Touches:
Add name and save as a pspimage.  Crop and resize as needed.  Save as a png and you are done.

Thank you for taking a look at my tut.  Any comments are greatly appreciated.

Friday, September 6, 2013

Sweet Punkin Pie

Sweet Punkin Pie:
©Barbara Butler
September 2013


Materials:
Scrap Kit:  Pretty Punkin By Amy Marie can be found Here
Template:  Pbs-Template163 By Punky Butts

Instructions:

Template: 
Open up the template.  Duplicate it CTRL+D and close the original.  Delete the copyright layer and make sure it is at 72DPI to stay within license companies policies.

Right and Left Orange Squares:
Select all>float>defloat.  Paste Paper2 as a new layer, invert and hit delete.  Select none.

Large Square:
Select all>float>defloat.  Paste Paper3 as a new layer, invert and hit delete.  Select none.

Right and Left Black Squares:
Select all>float>defloat.  Paste Paper9 as a new layer, invert and hit delete.  Select none.

Left top Square:
Select all>float>defloat.  Before copying and pasting Paper17 on to the working canvas mirror then copy.  Back on your working canvas paste it into selection.  Select none.

Right Bottom Square:
Select all>float>defloat.  Paste Paper17 as a new layer invert and hit delete.  Select none.

Black Circle:
Select all>float>defloat.  Paste Paper7 as a new layer, invert and hit delete.  Select none.

Element 46:
Paste on to canvas.  Resize by 75% twice and place on the bottom left.

Element 55:
Paste on to canvas.  Resize by 75% and place on the bottom right.

Element 59:
Paste on to canvas.  Resize by 75% three times.  Place on the top left.

Element 73:
Paste on to canvas.  Place on the bottom and behind the bottom elements.

Element 88:
Paste on to canvas.  Place on the right.

Element 87:
Paste on to canvas.  Place below Element 73.

Element 89:
Paste on to canvas.  Place above Element 73.

Element 78:
Paste on to canvas.  Resize by 75% three times.  Bring to the top and place on the bottom.


Tube:
Paste on to canvas.  Resize as needed.  Place to your liking.  Add copyright.  I'm using the poser that comes with the kit.  Go back to the circle layer.  Select all>float>defloat.  Paste tube as a new layer invert and hit delete.  Change the blend mode to whatever looks best with your tube choice i used Luminance.  Paste tube on to canvas again and resize as needed and place to your liking.

Finishing Touches:
Add name and save as a pspimage.  Crop and resize as needed.  Save as a png and you are done.

Thank you for taking a look at my tut.  Any comments are greatly appreciated