Saturday, August 31, 2013

♥Endless Story♥

Endless Story
©Barbara Butler
August 2013


Materials
Scrap Kit:  Endless Story By Rissa Designs
Mask:  Mask52 by MB and SW
Tube:  I'm using a Pinuptoon.  You can fine her and others at CDO.  Please do not use without buying the tube and having the proper license to do so.


Instructions:
all elements will be resized by 75% unless other wised stated.

New Image:
800x600 72dpi

Paper07:
Select all.  Paste into selection.  Select none.  Apply mask and merge mask group.  Duplicate 3 times.  Merge all three layers together.

Paper02:
Select all.  Add a new layer and paste paper into selection.  Select none.  Apply the same mask as before and merge the mask group.  Change the blend mode to multiply.

Book:
Paste on to canvas.  Resize three times.  Rotate 15 degrees to the left.  Place on the right side.

Bird:
Paste on to canvas.  Resize by 50% and place on the left side of the book.

Bag:
Paste on to canvas.  Resize by 50%, mirror and place behind the bird.

Butterfly:
Paste on to canvas.  Resize by 50% and place on the top left.

Fan:
Paste on to canvas.  Resize by 50% then by 75%.  Rotate 15 degrees to the right.  Place in the bottom left.

Frame03: 
Paste on to canvas.  Resize.  Rotate 15 degrees to the left.  With the magic wand click on the inside of the frame.  Expand by 4.  Paste Paper03 into selection.  Select none and move the paper layer below the frame in the layer palette.

Kitty:
Paste on to canvas.  Resize twice and place in front of the fan.

Lace:
Paste on to canvas.  Now we're going to use this to frame the outside of the frame if you want to resize now you can or you can wait until you have all your pieces into place.  You'll want four pieces merge all the pieces together after you get them to size you like, and on the bottom you'll need to erase the excess off.  And if need be move any elements to hide some of the bottom.  You can also use your deform tool to stretch it out a bit.

Lamp:
Paste on to canvas.  Resize and place behind the fan.

Right Side elements:
Resize each by 75% and rotate the book by 15 degrees to the left.

Tube:
Paste on to canvas.  Resize as needed.  Add copyright.

Finishing Touches:
I added a dropshadow to the frame but you dont have to.  Add name and save as a pspimage.  Crop and resize as needed and save as a png and you are done.

Thank you for taking a look at my tut.  Any comments are greatly appreciated.

Thursday, August 29, 2013

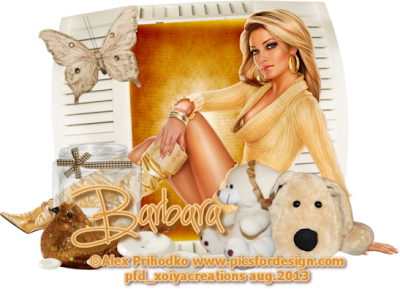
§Night Time§

Night Time
©Barbara Butler
August 2013


Materials

Scrap Kit:  Nighttime Plush by BLT Designz
Tube:  I'm using the beautiful artwork of Alex Prihodko.  You can fine this tube and others at PFD.  Please do not use without buying the tube and having the proper license for it.

Instructions:
All elements will be resized by 75% unless otherwise posted.

New Image:
800x600 72DPI

Bird:
Paste on to canvas.  Mirror and resize twice. 

Buttons:
Paste on to canvas.  Move down just a little bit on the canvas.  Resize by 75%.

Jar&Wrap:
Paste Jar on to canvas then paste the wrap.  Resize the wrap 75% three times then by 85% and place at the neck of the jar.  Merge the layers together.   Resize them two more times by 75%.  Place behind the bird.

Stuffed Dog:
Paste on to canvas.  Resize once and place on the right side.

TeddyBear1:
Paste on to canvas.  Resize three times.  Place on the left side of the dog.

Frame3:
Paste on to canvas.  Resize once.   Hide this layer and merge the other elements together and resize them by 75% once.  Unhide the frame.   With the magic wand click on the inside of the frame.  Expand by 8.  Add a new layer and paste PP9 into selection.  Select none.  Move the paper layer below the frame in the layer palette.

Butterfly:
Paste on to canvas.  Resize by 50% then by 75% twice.  Rotate 15 degrees to the left.  Place on top of the left shutter of the frame.

Tube:
Paste tube of choice on to canvas.  Resize as needed.  Place to your liking.  Add copyright.

Finishing Touches:
Add name to the tag and save as a pspimage.  Crop and resize the tag as needed.  Save as a png and you are done.

Thank you for taking a look at my tut.  Any comments are greatly appreciated.
Wednesday, August 28, 2013

§Java Joe§

Java Joe
©Barbara Butler
August 2013


Materials:
Scrap Kit:  Morning Coffee by Amy Marie can be found Here

Tube:  I'm using the artwork of Pinuptoons you can fine this tube and others at CDO.  Please do not use without buying it and having the proper license to use it.

Instructions
Most elements will be resized by 75% unless it says other wise.

New Image 800x600  72DPI

Element3:
Paste on to canvas.  Rotate 90 degrees either to the right or left it doesnt really matter.  Resize by 85%.  With magic wand click on the inside of the frame.  Add a new layer and paste Paper15 into the selection.  Select none.  Move the paper layer down below the frame in the layer palette.

Element8:
Paste on to the canvas.  Place on the right side.  Add a drop shadow of choice.

Element20:
Paste on to canvas.  Resize by 85%.  Place behind the branch.

Element22:
Paste on to canvas.  Resize twice.  Place on the left side.

Element23: 
Paste on to canvas.  Resize once.  Place behind the muffins.

Element24:
Paste on to canvas.  Resize once.  Place behind the kettle.

Element60:
Paste on to canvas.  Resize once.  Bring to the top.

Element91:
Paste on to canvas.  Place just above the frame in the layer palette.

Element101:
Paste on to canvas.  Resize once.  Rotate 15 degrees to the left.  Place in the top left corner.  Add a drop shadow of choice.

Tube:
Paste tube of choice on to canvas.  Resize as needed.  Place to your liking.  Add copyright.

Finishing Touches:
Add name to the tag and save as a pspimage.  Crop and resize the tag as needed.  Save as a png and you are done.

Thank you for taking a look at my tut.  Any comments are greatly appreciated.

§Autumn Days In Fairyland§

Autumn Days In Fairyland
©Barbara Butler
August 2013


Materials:

Scrap Kit:  Fairyland in Autumn By Amy Marie can be found Here

Mask:  Mask 53MBandSW

Tube:  I'm using the artwork of Anna Marine.  You can fine her stuff at CDO.  Please do not use without buying the tube and having the proper license to use it.

Instructions: 
Most elements will be resized by 75% unless it says other wise.
New Image:  800x600 72DPI

Paper4:
Select all and paste paper into selection.

Element9: 
Paste on to canvas.  Resize once.   Place on the right.  With magic wand click on the inside of each frame expand by 5.  Add a new layer and paste Paper16 into selection.  Select none.  Move paper layer down in the layer palette.

Element5: 
Paste on to canvas.  Resize by 50% then by 75% and place in the upper left corner of the frame.

Element16:
Paste on to canvas. Resize once.  Rotate 15 degrees to the right.  Place in the right corner of the last frame.

Element36:
Paste on to canvas.  Resize three times.  Place behind the butterfly.

Element38:
Paste on to canvas.  Mirror and resize twice.  Place on the left side of the canvas.

Element39:
Paste on to canvas.  Resize twice.  Place on top of Element38.

Element45:
Paste on to canvas.  Resize once.  Place behind the other two elements on the left.  Duplicate and mirror.  Move the duplicate over to the right a little bit.

Element78:
Paste on to canvas.  Place behind the others on the left.

Element79:
Paste on to canvas and mirror it.  Resize once.  Place in front of Element78.

Element80:
Paste on to canvas.  Mirror it and place behind Element36.

Element106:
Paste on to canvas.  Place in front of Element 45.  Move the duplicate of Element45 over and up just a little so you can see it.

Element137:
Paste on to canvas.  Place above the first paper layer.  Mirror it.

Element132:
Paste on to canvas.   Place behind the clock on the right.   Paste it on the canvas and place it on top of the first paper layer.  Leave right where it is.

Element133:
Paste on to canvas.  Resize twice.  Move to the left just a little from where it was when you pasted it.

Element4:
Paste on to canvas.  Resize four times.  Place on top of the rainbow.  Duplicate this.  Resize the duplicate and place at the other end of the rainbow to hide end a little.

Tube:
Paste on to canvas.  Resize as needed.  Place to your liking.  Add copyright.

Finishing Touches:
Add name and save as a pspimage.  Crop and resize as needed.  Save as a png and you are done.

Thank you for taking a look at my tut.  Any comments are greatly appreciated.

Friday, August 23, 2013

~♥~Cherry Blossom~♥~

Cherry Blossom
©Barbara Butler
August 2013


Materials
Scrap Kit:  Cherry Picker By BLT Designz
Template:  BY Divine Intentions (this was apart of finish this tag over at Creative Misfits you might be able to fine it on her blog now though).
Tube:  By Melissa Dawn.  Her tubes can be found at CDO.  Please do not use without buying it and having the proper license to use it.


Instructions:
See my tag for element placement.  And remember to save often.  Make sure the template is at 72 DPI to stay within the tube artists TOU.


Template:  Open and duplicate.  Delete any copyrights.

Raster7:  Select all>float>defloat.  Paste PP13 into selection.

Raster5:  Select all>float>defloat.  Paste PP14 into selection.

Raster4:  Select all>float>defloat.  Paste PP2 into selection.

Copy Of Raster6:  Select all>float>defloat.  Paste PP10 into selection.

Raster6:  Select all>float>defloat.  Paster PP10 into selection.

Copy of Raster8:  Select all>float>defloat.  Paste PP7 into selection

Raster8:  Select all>float>defloat.  Paste PP7 into selection.

Copy of Raster19:  Select all>float>defloat.  Paste PP3 into selection

Raster19:  Select all>float>defloat.  Paste PP3 into selection.

Copy of Raster16:  Select all>float>defloat. Paste PP1 as a new layer.  Invert and hit delete.

Raster16:  Select all>float>defloat.  Paste PP1 as a new layer.  Invert and hit delete.

Copy of Raster15:  Select all>float>defloat.  Paste PP6 as a new layer, invert and hit delete.

Raster15:  Select all>float>defloat.  Paste PP6 as a new layer, invert and hit delete.

Raster9:  Select all>float>defloat.  Paste PP4 into selection

Copy of Raster9:  Select all>float>defloat.  Paste PP4 into selection.

Raster10:  Select all>float>defloat.  Paste PP4 into selection.

Raster12 and Copy of Raster12:  Select all>float>defloat.  Paste PP8 into selection.

Raster13 and Copy of Raster13:  Select all>float>defloat.  Paste PP9 into selection.

Raster20 and Copy of Raster20:  Select all>float>defloat.  Paste PP12 into selection.

Raster18 and Copy of Raster18:  Select all>float>defloat.  Paste PP11 as a new layer, invert, and hit delete.

Raster2:  Select all>float>defloat.  Paste PP5 into selection.

Raster11 and Copy of Raster11:  Select all>float>defloat.  Paste PP5 into selection.

Bird:  Paste on to canvas.  Resize by 75% twice.

Bottles:  Paste on to canvas.  Resize by 65% twice, and mirror.

Butterfly:  Paste on to canvas.  Resize by 65% twice.  Rotate 15 degrees to the left.

Clock:  Paste on to canvas.  Resize by 65% twice.

Fan:  Paste on to canvas.  Resize by 65%.

Grass:  Paste on to canvas.  Resize by 65% twice.

Bow:  Paste on to canvas.  Resize by 65%.

Tube:  Paste on to canvas.  Resize as needed.  Add copyright

Finishing Touches:  Add name.  Save as a pspimage.  Crop and resize as needed.  Save as a png and you are done.

Thank you for taking a look at my tut.  Any comments is greatly appreciated.

Monday, August 19, 2013

♥Sweet Cherries♥

Sweet Cherries
©Barbara Butler
August 2013


Materials:

Scrap Kit:  Cherry Cuppies by Rissas designs Here

Template:   Template74 also by Rissas designs 

Mask:  WSLMask84

Tube:  Red_Rose by Alehandra Vanhek.  She can be found at PFD.  Please do not use without buying her and having the proper license.

Instructions:
See my tag for placement of elements.

Template:  Open, duplicate and close the original.  Delete the copyright layer.  Make sure the template is at 72dpi to stay within artists TOU.

Raster5:  Select all>float>defloat.  Paste Paper10 as a new layer, invert and hit delete.

Raster4:  Select all>float>defloat.  Paste Paper5 into selection.

Raster3:  Select all>float>defloat.  Paste Paper1 into selection.

Raster2:  Select all>float>defloat.  Paste Paper4 as a new layer, invert and hit delete.

Raster1:  Select all.  Paste Paper 2 into selection.  Apply the mask.

FlowerVine:  Paste on to canvas.  Place to the left.  Resize by 64%.

Fan:  Paste on to the canvas.  Resize by 64% and place behind the vine.

Cupcake4:  Paste on to canvas.  Resize by 64% twice.

CherryBranch:  Paste on to canvas.  Resize by 64% twice.

Butterfly1:  Paste on to canvas.  Resize by 64% twice.  Rotate 15 degrees to the right.

Butterfly2:  Paste on to canvs.  Resize by 64% and mirror it.

Candy:  Paste on to canvas.  Resize by 64% twice and mirror it.

CakePops:  Paste on to canvas.  Resize by 64% twice.

IceCreamTreat:  Paste on to canvas.  Resize by 64% then by 75%.

Tube:  Paste on to canvas.  Resize as needed.  Add copyright.

Finishing Touches:  Add name.  Save as a pspimage.  Crop and resize as needed.  Save as a png and you are done.

Thank you for taking a look at my tut.  Any comments is greatly appreciated.

Friday, August 16, 2013

§Lemonade Stand§

Lemonade Stand
©Barbara Butler
August 2013


Material:

Scrap Kit:  Sweet Lemonade by Redefined Designs can be found Here


Instructions
See my tag for element placement.

New Image 900x700

Frame2:  C&P on to canvas.  Click on the inside with your magic wand.  C&P Paper1 as a new layer, invert and hit delete.  Select none.  Add a drop shadow of choice.

Branch:  C&P on to canvas.  Resize by 75% twice.  Rotate 15 degrees to the left.  Duplicate and mirror.  Move over the left side.  Flip upside down and move to the top.

Bow2:  C&P on to canvas.  Resize 75% and place between the two branches.

Butterfly2:  C&P on to canvas.  Resize 75% four times.  Rotate 15 degrees to the left.

Flower1:  C&P on to canvas.  Resize by 50%.

Glass:  C&P on to canvas.  Resize 50% twice.

Lemonade:  C&P on to canvas.  Resize by 50% then by 75%.

Sign:  C&P on to canvas.  Resize by 50%.  Place just below the Bow.

Tube:  Add your tube and copyright.

Finishing touches:  Add a drop shadow to all the bottom elements.  Add name (do not convert to raster layer just yet), save as a pspimage.  Now convert the name to a raster layer then save as a png.  And you are done.

Thank you for taking a look at my tut.  Remember any comments is greatly appreciated.

Tuesday, August 13, 2013

Soft Touch Of Autumn

Soft Touch Of Autumn
©Barbara Butler
August 2013


Materials:

Scrap Kit:  Autumn Softly by BLT Designz

Tube:  Autumn by Keith Garvey.  Please do not use without buying it and having the proper license.

Instructions:
See my tag for proper placement of elements.

Fox:  C&P on to canvas.  Resize by 50%.  Place on the left side.

Candle:  C&P on to canvas.  Resize by 50%, mirror and place beside the fox.

Leaf:  C&P on to canvas.  Resize by 75%.  Place on the right of the fox and move the layer down.  Duplicate mirror and place on the other side of the fox.

Butterfly:  C&P on to canvas.  Resize by 75%.  Move to the left and place behind the candle.

Bridge:  C&P on to canvas.  

Flower6:  C&P on to canvas.  Resize by 75% twice.  

Mask:  C&P on to canvas.  Resize by 75% three times.  Mirror and place in front of the candle.

Tube:  C&P on to canvas.  Resize as needed.  Add copyright.

Finishing Touches:  Add name (do not convert to a raster layer just yet), save as a pspimage.  Now convert to a raster layer and add any effects you would like.  Crop and resize as needed.  Save as a png and you are done.

Thank you for taking a look at my tut.  Any comments are greatly appreciated.


Hidden Treasures

Hidden Treasure
©Barbara Butler
August 2013


Materials:

Scrap Kit:  Mermaid Treasure by Jackie's Jewels can be found at Mystical Scraps

Template:   Template02 By Yvette.  Not sure where it can be found but if someone knows please let me know and I'll link it.  

Tube:    Oceane by Keith Garvey please do not use without buying it and having the proper license.

Instructions
See my tag for placement.  

Template:  Open, duplicate and close the original. Delete the copyright layer.

White Squares2:  Select all>float>defloat.  Paste PP11 into selection.

White Squares1:  Select all>float>defloat.  Paste PP11 into selection.

Grey Rectangle:  Select all>float>defloat.  Paste PP1 into selection.

Large Dotted Line:  Select all>float>defloat.  Paste PP10 into selection.

Large Black CIrcle:  Select all>float>defloat.  Paste PP3 as a new layer.  Invert the selection, and hit delete.  

Blue Circle1:  Select all>float>defloat.  Paste PP9 into selection.

Blue Circle2:  Select all>float>defloat.  Paste PP9 into selection.

Thin Rectangles:  Select all>float>defloat.  Paste PP7 into selection.

Bootle Fish:  C&P on to canvas.  Resize by 75% twice.  

Coral2:  C&P on to canvas.  Move layer down below the bottle fish.

Clam Shell:  C&P on to canvas. Resize by 75% three times and mirror it.

Netting2:  C&P on to canvas.  Place on the bottom and below the other elements.  Duplicate it a couple of times and merge them with the original.

Seahorse:  C&P on to canvas.  Resize by 75% twice.  Place inside the clam shell.

Rock Cave:  C&P on to canvas.  Resize by 75% twice.  Move below the netting.

Sign:  C&P on to canvas.  Resize by 75% twice.  Rotate 15 degrees to the left.   Place in front of the netting and slightly behind the clam shell.

Dolphin:  C&P on to canvas.  Rotate 15 degrees to the left.  Move to where just the tip of the tail is behind the corel.

Tube:  C&P on to canvas.  Resize as needed.  Add copyright.

Finishing Touches:  Add name (do not convert to a raster layer just yet), save as a pspimage.  Now convert to a raster layer and add any effects you would like.  Crop and resize as needed.  Save as a png and you are done.

Thank you for taking a look at my tut.  Any comments are greatly appreciated.

Pretty Little Thing

Pretty Little Thing
©Barbara Butler
August 2013


Materials:

Scrap Kit:  Make Me Pretty By Rissa's Designs 

Template:  Missy_Template180 By Missy can fine it at divineintentionz.blogspot.com

Tube:  I'm using the artwork of Alex Prihodko.  Please do not use without buying it and having the proper license.

Instructions:

Template:  Open template, duplicate it and close the original.  Delete the copyright layer.

Circle:  Select all>float>defloat.  Paste Paper3 into selection.  Select none.

Thin Rectangle1:  Select all>float>defloat.  Paste Paper5 as a new layer, invert selection and hit delete.  Select none.

Thin Rectangle2:  Select all>float>defloat.  Paste Paper6 as a new layer, invert selection and hit delete.  Select none.

Thin Rectangle3:  Select all>float>defloat.  Paste Paper4 as a new layer, invert selection and hit delete.  Select none.

Circle Background:  Select all>float>defloat.  Paste Paper4 as a new layer again, invert and hit delete.  Select none.

Circle1:  Select all>float>defloat.  Add a new layer and paste Paper2 into selection.  Select none.  

Circle2:  Select all>float>defloat.  Add a new layer and paste Paper1 into selection.  Select none.

Dressing Table:  C&P on to canvas.  Resize by 50%.  With magic wand click on the empty spot on the stool expand the selection by 1. Paste Paper4 as a new layer invert and hit delete.  Select none.  Add an inner bevel of choice to make it look like a cushion.  Move this layer below the table.  Merge the two together.  Resize by 75% and move to the right.   Now click on the inside of the oval part and paste Paper6 as a new layer invert and hit delete.  Move this layer below the table and merge the two layers.

Fan:  C&P on to canvas.  Resize by 50% twice.  Place on the left.  Rotate 15 degrees to the left.

Pillow:  C&P on to canvas.  Resize by 50% twice.  Place it behind the fan.

Martini:  C&P on to canvas.  Resize by 50% twice.  Place in front of the fan and to the left.

Candle:  C&P on to canvas.  Resize by 50% twice then by 75%.  Place to the right of the fan.  Paste the candle again.  Resize this one by 50% twice.  And place to the right of the first one and in the layer palette move it down.

Butterfly1:  C&P on to canvas.  Resize by 50% twice.  Place to your liking.

Lipstick:  C&P on to canvas.  Resize by 50% twice.  Place behind the martini glass and on the left side of it.

Umbrella:  C&P on to canvas.  Resize by 50%.  Move behind the other elements on the left.

Winged Lips:  C&P on to canvas.  Resize by 50%.  Move in front of the bottom circle.

Strawberry:  C&P on to canvas.  Resize by 50% twice.  And place on the right side of the winged lips.

Tube:  C&P on to canvas.  Resize as needed.  Place to your liking.  Add copyright.

Finishing Touches:  Add name (do not convert to a raster layer just yet), save as a pspimage.  Now convert to a raster layer and add any effects you would like.  Crop and resize as needed.  Save as a png and you are done.


Thank you for taking a look at my tut.  Any comments are greatly appreciated.

Sunday, August 11, 2013

Beach Candy

Beach Candy
©Barbara Butler
August 2013


Materials:
Scrap Kit:  Candy Beach By Rissa Designs can be found Here

Tube:  Roxy by Ellie Milk can be found at PFD.   Please do not use without buying it and having the proper license.

Instructions:

New image 900X600.  See my tag for element placement.

Sand:  C&P on to the canvas.

Deck Chair:  C&P on to the canvas.  Resize by 50%.

Bottle:  C&P on to the canvas.  Resize by 50%.

Butterfly:  C&P on to the canvas.  Resize by 50%.  Mirror and place behind the chair.

Palm Tree:  C&P on to the canvas.  Resize by 75%.  Place behind the other elements.

Seagull:  C&P on to the canvas.  Place right beside the palm tree.

Flowers:  C&P on to the canvas.  Resize by 50% then by 75%.  Place between the chair and bottle.

Candy:  C&P on to the canvas.  Resize by 50% then again by 75%.  Place at the foot of the chair.

Seashell1:  C&P on to the canvas and send to the bottom.

Tube:  C&P on to the canvas.  Resize as needed.  Place where you think it looks best.  Add copyright.

Finishing Touches:  Add name (do not convert to raster layer).  Save as a pspimage.  Convert it to a raster layer.  Crop and resize as needed and save as a png.  And you are done.


Thank you for taking a look at my tut.  Any comments is greatly appreciated.

Flutterby

Flutterby
©Barbara Butler
August 2013


Materials:

Scrap Kit:  MayFlutterbies by TLP can be found Here

Template:  by Missy of the creative misfits you can fine it on her blog divine intentions.

Tube:  I'm using the artwork of Ellie Milk you can fine her tubes at PFD.  Please do not use without buying them and having the proper license.

Instructions:

Template:  Open up.  Duplicate it and delete the original.  Delete the copyright and the wordart layers (Except the sunshine word).

Raster7:  Click on the inside with your magic wand.  Add a new layer and paste PP07 into selection.  Select none.

Raster9:  Click on the inside with your magic wand.  Add a new layer and paste PP08 into selection.

Raster8:  Click on the inside with your magic wand.  Paste PP10 as a new layer invert and hit delete.

Raster3:  Click on the inside with your magic wand (if you want you can click on them individually and add different papers to each but if you do that you'll want to start on Raster1 instead of this one).  C&P PP04 as a new layer invert and hit delete.

Brush Layer:  With your selection tool draw a small selection around the dashes (not the butterflies) and hit delete.  Now Select all>float>defloat> paste PP01 into selection.

Elements:  The elements each come in different colors and you can pick what ever color you want, instead of what I pick.

Bow3:  C&P on to the canvas.  Resize by 50% twice.  Rotate 15 degrees to the left.  Place in the top right hand corner of the frame on the right.

Butterfly05:  C&P on to the canvas.  Resize by 35% then by 75%.  Place in the left corner of the left frame.  Rotate 15 degrees to the left and add a drop shadow of choice.

Flowers13-15:  C&P on to the canvas.  Rearrange themhowever you want.  Merge the three together and resize 35%.  Place in front of the middle frame.

Sunshine wordart:  Select all>float>defloat> Paste PP04 into selection.  Add an eye candy, inner bevel and a drop shadow of choice.

Tube:  You are going to want about four different tubes from the same artist.  One regular size and the other four close ups.  Place the main tube where you would like.  And place one of each close up in each frame.  For the close ups go to white frame layer and click on the inside of the frame(where the paper sits), and paste tube as a new layer resize as needed invert and hit delete.  Do this part for each frame.  Change the blend mode for each to something that will fit your tube and the paper below. Add copyright.  

Finishing Touches:  Add name (do not convert to raster layer) and save as a pspimage.  Convert the name to a raster layer.  Crop and resize as needed and save as a png.  You are now done.

Thank you for taking a look at my tut.  Any comments is greatly appreciated.

Sharing Is Caring

Sharing is Caring
©Barbara Butler
August 2013


Materials:

Scrap Kit:  Lets Share By BLT Designz 

Template:  Template 49 by Rissa Designs 

Tube:  I'm using the artwork of Very Many.  You can buy this tube at PFD.  Please do not use without buying it and having the proper license.

Instructions:  
See my tag for placement of elements.

Template:  Open and duplicate.  Delete the copyright layer.  Make sure the template is at 72 DPI to stay with the TOU of tube companies.

Raster1:  Select all>float>defloat.  Paste PP14 as a new layer invert and hit delete.

Raster2:  Select all>float>defloat.  Paste PP11 into selection.

Raster3:  Select all>float>defloat.  Paste PP14 as a new layer invert and hit delete.  

Raster4:  Select all>float>defloat.  Paste PP3 as a new layer invert and hit delete.

Raster5:  Select all>float>defloat.  Paste PP12 as a new layer invert and hit delete.

Raster6:  Select all>float>defloat.  Paste PP9 into selection.

Raster7:  Select all>float>defloat.  Paste PP9 into selection.

Raster8:  Select all>float>defloat.  Paste PP8 as a new layer invert and hit delete.

Raster9:   Select all>float>defloat.  Paste PP5 into selection.

Raster10:  Select all>float>defloat.  Paste PP5 into selection.

Tree:  C&P on to canvas.  Resize by 75% twice.  Place on the right.

Flower1:  C&P on to canvas.  Resize by 85%.  Roate 5 degrees to the right.

Doodle:  C&P on to canvas.  Place behind Flower1 rotate10 degrees to the left.

Fence:  C&P on to canvas.  Resize by 50% then by 75% and place behind Flower1 and doodle.

Branch: C&P on to canvas.  Resize by 50%.  Place in front of the fence.

Butterfly:  C&P on to canvas.  Resize by 50% twice.  Rotate 15 degrees to the left and place on the left side of the doodle.

Bear3:  C&P on to canvas.  Resize by 50% twice. 

Tubes:   C&P on to canvas.  Resize as needed.  Add copyright.

Finishing Touches:  Add name (do not convert to a raster layer), save as a pspimage.  Convert your name to a raster layer.  Crop and resize as needed.  Add any embelishments that you want. Save as a png and you are done.

Thank you for taking a look at my tut.  Any comments is greatly appreciated.

The Pumpkin Patch

The Pumpkin Patch
©Barbara Butler
August 2013

Materials:

Scrap Kit:  Pumpkin Carving TS by BLT Designz  Tagger Size can be found Here Full Size can be found Here

Template:  63 by Rissa Designs

Tube:  Tube of choice.  I'm using an exclusive tube from Alehandra Vanhek which can be found at PFD.

Instructions:  
See my tag for placement of elements.

Template:  Open and duplicate.  Delete the copyright layer.

Raster5:  Select all>float>defloat.  Paste PP13 into selection.

Raster4:  Select all>float>defloat.  Paste PP11 into selection.

Copy of Raster3:  Select all>float>defloat.  Paste PP10 as a new layer invert and hit delete.

Raster3:  Select all>float>defloat.  Paste PP10 as a new layer invert and hit delete.

Raster2:  Select all>float>defloat.  Paste PP1 as a new layer invert and hit delete.

Owl:  C&P on to canvas.  Resize by 50% then by 75%.  

Pumpkin String:  C&P on to canvas.  Resize by 75%.

Tree:  C&P on to canvas.  Resize by 45%.  Back on the circle layer select all float defloat invert back on the tree layer move the tree over a little bit then hit delete.

Scatter:  C&P on to canvas.  Resize by 45%. 

Leaves2:  C&P on to canvas.  Resize by 45% twice.  Place beside the owl.  Duplicate and mirror and place on the opposite side.  Place behind the owl in the layer palette.

Chair and Cat:  C&P chair on to canvas.  Then C&P cat on to canvas.  Resize the cat by 75% twice.  Merge the cat down with the chair.  Resize by 75% three times and move to the right.

Tube:  C&P tube on to canvas.  Resize as needed.  Add copyright.

Finishing Touches:  Add name (do not convert to a raster layer), now convert to a raster layer.  Add any effects you would like.  Crop and resize as needed.  Save as a png and you are done.

Thank you for taking a look at my tut.  Any comments is greatly appreciated.

Friday, August 9, 2013

Steam Love

Steam Love
©Barbara Butler
August 2013

Materials:

Scrap Kit:  Steam Punk Love by Scottish Butterfly can be found Here

Template: Template 47 by Rissa Designs

Instructions:
See my tag for element placement.

Template:  Open and duplicate.  Close the original template.  Delete Copyright layer and layers 7&8

Layer9:  With magic wand click on the inside of the circle.  Add a new C&P Paper13 into selection.  Select none.

Layer6:  With magic wand click on the inside.  Add a new layer C&P Paper8 into selection.

Layer5:  With magic wand click ont the inside.  Add a new layer C&P Paper3 into selection.

Laye4:  With magic wand click on the inside.  Add a new layer and C&P Paper3 into selection.

Layer3:  With magic wand click on the inside.  Add a new layer C&P Paper2 into selection.

Layer2:  With magic wand click on the inside.  Add a new layer C&P Paper2 into selection.

Laye1:  With magic wand click on the inside.  Add a new  C&P Paper14 into selection.

Element57:  C&P on to the canvas.  Resize by 75% twice.

Element54:  C&P on to the canvas.  Resize by 50% then by 75%.

Element52:  C&P on to the canvas.  Resize by 75%.  Move below the other two elements.

Element41:  C&P on to the canvas.  Resize by 75%.  Rotate 15 degrees to the right.

Element40:  C&P on to the canvas. Resize by 45% then by 75% rotate 15 degrees to the left.

Element5:  C&P on to the canvas.  Resize by 75%.

Tube:  C&P on to the canvas.  Resize as needed.  Add copyright

Finishing Touches:  Add name (do not convert to a raster layer yet), save as a pspimage.  Convert name to a raster layer.  Add any effects you want.  Crop and resize as needed.  Save as a png and you are done.

Thank you for taking a look at my tut.  Remember any comments is greatly appreciated.